


Living the mobile home life comes with a unique set of perks. The affordability and flexibility you gain with a manufactured home allow you to own your slice of the American Dream. However, with great freedom comes great responsibility. Making sure your mobile abode can stand strong in extreme weather sits high atop that responsibility list. Properly installed anchoring tie downs for mobile homes serve as your home’s lifeline in windstorms. They secure the structure to the ground, preventing flipping, sliding, or other hazardous movement. Think of them as seat belts for your house. You’d strap yourself in before heading out on the open road, right? Well, it’s high time to “buckle up” your mobile house for its own safety journey.
This guide will walk first-time homeowners like yourself through the entire tie downs for mobile homes installation process. Follow along as we navigate site prep, equipment choices, step-by-step instructions, and maintenance tips. Soon, you’ll know exactly how to keep your mobile nest sturdy in the midst of meteorological mayhem. Time to batten down the hatches and dive in!
Prepping Your Property
Ensuring a flat, even pad lay crucial groundwork for keeping your anchored setup secure.
Level the Land
Parking your mobile housing on angled ground places strain on critical components like the chassis frame, plumbing lines, and entry stairs. It also causes tie downs to loosen over time as the home shifts towards the lower side. Prevent this unnecessary stress by grading and filling the land first.
Create a flat, compacted surface at least the full length and width of your unit. Pack the soil firmly and evenly across the pad using equipment like a vibrating plate compactor. You want minimal sinkage so the home stays stable. This gives tie downs the best chance at keeping things locked in place.
Pour a Concrete Slab
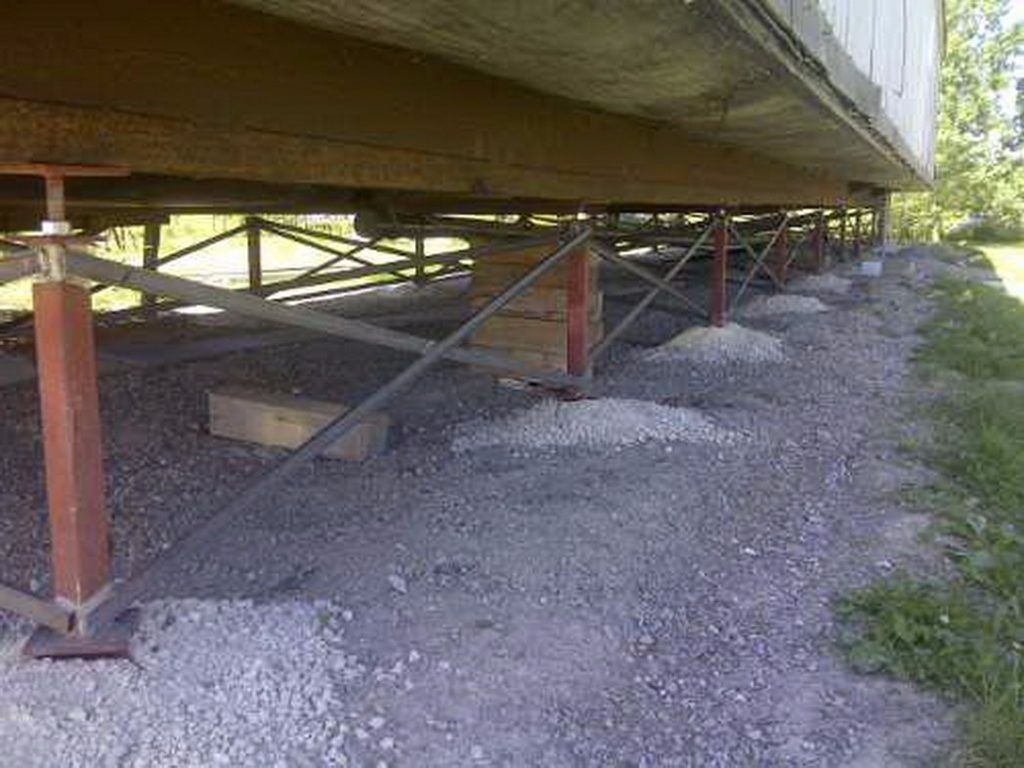
In some cases, a thick concrete slab offers the most reinforcement for anchoring equipment. Heavy winds or storms may cause deeply set anchors to tug and dig into softer soils. This allows the entire home to drag or sway.
Concrete slabs provide an ultra-solid platform that resists giving way. They also maintain dead-level spacing in all corners, which reduces strain on tie downs. If your region faces moderate storm threat or has primarily sandy/gravelly dirt, talk to your installer about laying a high-strength concrete base.
Inspect the Site
Before setting your unit, carefully survey the land for signs of drainage issues. Pay special attention to sloped areas or sections holding unusually damp soil. Excess moisture deteriorates subsurface stability over time. Have any wet regions properly filled and packed down for maximum density.
If installing on bare earth, test ground hardness by driving a thin rod into different areas across the pad. Measure the depth it sinks after several blows from a heavy hammer. Softer spots indicate looser soil that won’t grip anchors as effectively long-term.
Equipment Essentials
These vital components form your mobile home’s structural safety net when gale forces hit.
Anchor Style
There exist several anchor types specially designed for securing manufactured houses. The one best suited to your situation depends on factors like:
- Wind zone/exposure risk
- Soil composition
-expert recommendations for your region
Some common residential varieties include:
Screw Anchors
These corkscrew metal shafts twist into the earth for firm holding power. Quick and easy DIY installation makes them ideal for singlewide units.
Deadman Anchors
A buried metal rod connects via cable to an exterior hooking mechanism. The below-ground rod provides downward force to counteract blowing wind loads.
Concrete Deadmen
This bulkier anchor type plants a solid concrete block down low beside the home. Hooks then tie the home’s frame directly into the unmoving deadman via tough cables.
Lag or Expansion Anchors
If pouring a concrete pad, these special anchors bolt through the slab surface. The expanding ends grip underneath tightly for pure vertical resistance against upward wind forces.
Straps and Cables
Thick steel cable comprises the flexible tethering linkage running between exterior anchors and the interior home framework. Nylon straps also work well with lighter gauge安克系统, especially in lower risk wind zones. The engagement point lies either directly atop the roof trusses or up under the main chassis I-beam.
Cable ends attach via strong bolts or clamps. Their exceptional tensile strength keeps even multi-section properties firmly planted through savage storms. Just take care to install weatherproof flashing wherever straps or cables contact the roof.
Accessory Equipment
Finally, don’t forget smaller add-ons that play a vital role in keeping heavy-duty tie downs intact. These include:
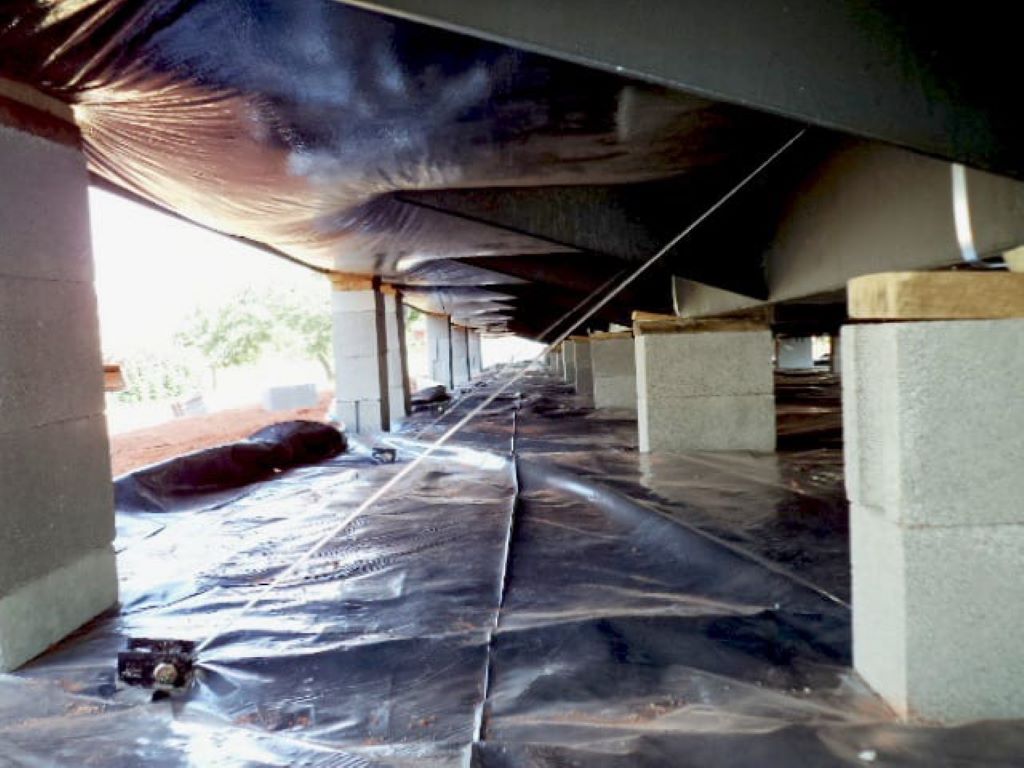
- Thick concrete pier blocks for building raised anchor points
- Sheet metal protective flashing
- Durable rubber grommets wherever cables cross framing
- Torque wrench for checking bolt tension
- Backup washers, lock nuts, and retaining pins
Once you gather all the essential gear, it’s go time! Let’s walk through the step-by-step process for getting your mobile house anchored for optimal safety and stability.
Installation How-To
Follow this sequence for ensuring your tie down system stays secure for the long run.
- Calculate Needed Anchor Points
Local regulations set standards for how many tie down points your setup requires based on factors like:
- Wind zone/gust speeds
- Unit length
- Building elevation
- Roof slope angle
Free online calculators help determine the ideal number and placement of anchors to meet code in your ZIP code. Just plug in the specs of your manufactured home.
Also check your anchor product guidelines for any rules on maximum spacing between hardware. Evenly spaced anchors prevent localized stress imbalances across the frame.
- Locate Installation Sites
Creating a basic site map helps organize the anchor positioning process. Reference property boundaries, existing structures, and local buried utility lines so you can navigate open zones.
Then approximate initial locations based on the minimum anchor count needed. Double check all spots allow enough clearance from blocking elements that could obstruct drilling or excavation.
Use spray paint or colored flags to denote each hardware install site for easy digging access. Just take care around drainage areas, septic connections, propane tanks, or driveway spaces.
- Dig Holes
Now comes the sweaty part…manually excavating enough earth for setting your anchors. Grab that shovel and start digging straight down at each marked site.
Dig down to the minimum depth advised by the product manual for maximum ground friction. Sandy soils call for deeper holes, while compacted clay only needs shallow gaps.
Clear loose residue from the pit bottom so anchors make direct contact with packed earth. Test the hole width by lowering in anchors before backfilling later.
- Install Anchors
With holes prepped, carefully lower anchors into each crater. Drive the tip end straight down until reaching specified soil penetration depth. Consider using a temporary guiding tube to align screws perfectly vertical as you turn them in.
For non-screw options like deadmen, manually orient the anchor end towards the trailer. Maintain enough interior clearance to allow linking cables through later.
Check product guidelines for tips on augmenting marginal soils. Certain loose sands may require concrete backfill collars around shallow anchors for example.
- Attach Cables
Once anchors stand locked in place, thread cables down through the framework underside. Consult original structural plans showing the chassis layout if unclear on ideal connection points. Key targets include:
- Steel I-beams or outriggers
- Axle hangers
- Main side joists
Pull each cable end back up from underneath and feed through a pre-drilled frame hole. Protect any exposed edges with durable grommets before bolting the strap end tightly in place across steel backer plates.
Repeat at corresponding roof joists for an over-the-top mounted approach. Just be sure to install weatherproof flashing underneath for leaks prevention.
- Tension Cables
With all cables initially linked, manually take up any slack so lines sit taught. Then stick a torque wrench onto the main bolt head and dial it carefully up to the target tension setting.
Overtightening risks cable damage or frame buckling. But leaving things too loose nullifies crucial hold down strength when heavy winds hit. Confirm the right torque range for your cable type and anchor model.
Double check by pushing sideways on the home frame while cords stay taut. If no give occurs, the anchors should hold things steady through storms.
- Backfill Holes
Cables and anchors now stand fully set. The last step involves backfilling all the bored holes across your lot. Shovel original soil inward until reaching ground level. Pack each layer down firmly before adding the next.
Consider pouring concrete collars around key anchors for enhanced downward resistance. Just keep the concrete a few inches below grass level for easy mowing access.
And voila! Your manufactured housing should now withstand even Category 3 hurricanes thanks to a dialed-in tie down system. But never assume and forget those cables exist. Consistent checks and care ensure lifelong performance.
Ongoing Inspections & Maintenance
Stay ahead of any brewing problems through periodic reviews of all system components.
Monitor Anchor Tension
Heavy rains, loose soils, and seismic activity can cause anchored cables to slacken over time. But leaving them too loose greatly cuts hold down effectiveness.
Inspect anchor tension at least once per year by pushing laterally against the frame while cables stay taut. Check for any movement indicating the need for re-torqueing bolts back to spec.
Also visually check straps and cables for fraying, kinks, or cracks threatening integrity. Damaged pieces require immediate replacement to avoid total system failure. Consider spray painting exposed sections to check for stretch related thinning when inspected up close.
Ensure Ground Contact
A huge factor in total anchor strength lies in maintaining solid ground contact below each bored hole. Any air pockets, soil voids, shifting, or upheaval gives the anchor “wiggle room” to pull free under extreme loads.
Carefully check around anchor sites for signs of sinking or upthrust Every 6 months. Refill any visible gaps or cracks with tightly packed soils to restore firm footing. Severe erosion may require drilling out the entire anchor for resetting or replacement in worse case scenarios. But take care not to damage critical utilities nearby when digging around existing infrastructure anchors.
Check Structural Links
While cosmetically hidden from view, the critical linkage points between anchor cables and your home’s internal framing beg regular inspection too.
Access the gloomy space underneath every year or so using strong work lights. Scan along the frame for any signs of:
- Visibly stretched or deformed cables
- Loose, broken, or missing bolt heads
- Buckled backer plates or wall frames
- Grommets popping free of their holes
Address any red flags immediately to avoid a thin link suddenly snapping mid-storm. Having backup grommets, bolts, reinforced backer plates, and patching compounds on hand allows for quick repair jobs.
Inspect Entry Points
Also peek inside at roof joists connecting over-the-top cabling whenever possible. Scan for warped or cracking trusses near stress points that may warrant reinforcements.
Use binoculars and digital zoom camera snaps to double check outdoor roof entry zones you can’t reach by hand. Search those flashing spots for leaks, tears, lifted shingles, and premature rust creeping on exposed bolt heads or edges after several seasons.
Make Any Needed Repairs
Don’t let seemingly minor structural or sealing issues spiral into more threats by ignoring them! Forking up a few bucks and hours now prevents thousands in storm damage later.
Consult reputable contractors specializing in mobile home structural upgrades for guidance. They can assess trouble areas and offer the best repair approach.
Some common solutions include:
- Filling foundation cracks
- Adding supplemental roof brackets 增加补充
- Regrading areas around sinking anchors
- Reinforcing backer plates
- Reflashing degraded cable holes
Conclusion
We’ve covered all the basics for keeping your mobile dwelling stable through wild weather, but here’s a quick recap:
- Prep the installation site—fill low spots, fix drainage, ensure ultra-flat hard packed soil for best anchor holding power long term
- Choose anchor type and accessories wisely based on local wind risk, water table level, and soil data
- Calculate then map optimal anchor placements per manufacturer specs
- Bore straight down to needed depth based on soil conditions
- Set anchors plumb and tension to cable connections to avoid slack
- Backfill holes carefully to prevent uplift or shifting forces
- Recheck tension and visually inspect ALL system components regularly as preventative maintenance!
Discover the peace of mind that comes with the benefits of installing a smart lock in your home—enhanced security, convenience, and control. Equipped with this tie downs for mobile homes guide, you can now confidently install and maintain sturdy tie downs built to save mobile homes from high wind damage. Just stay diligent in those quarterly reviews, lest your anchors gradually loosen their grip. Think proactive protection rather than reactionary repairs!
FAQs
How often should I check my anchors?
Conduct visual inspections of all visible system components at least every 3 months. Use binoculars as needed for roofline integrity checks. More robust hands-on frame and tension checks should happen annually.
Do mobile home anchors ever need replacing?
Most quality screw, deadman, or pier products last upwards of 50 years! But degraded cables, bolts, grommets or backer plates may need swaps every decade or so pending wear and tear in your climate.
What’s better – frame anchors or roof anchors?
Both setups work very effectively, but roof anchors avoid intrusive interior access issues. Frame types offer more versatile positioning but roof mounts are less aesthetic with security cables crossing over trusses.
How much wind can home anchors withstand?
Properly installed systems handle up to 120 MPH gusts in coastal regions! Always match components to the maximum regional wind speeds experienced over decades.
Will my homeowner’s insurance cover storm damage if anchors fail?
Most policies do cover wind damage nowadays. But some may attempt to deny claims if your tie-downs prove outdated or improperly maintained. Keep inspection logs as proof!