











Electrical wire installation in conduit is the process of routing insulated conductors through protective tubing systems to ensure mechanical protection, electrical safety, and code compliance. It is widely used in residential, commercial, and industrial projects.
A single wiring mistake can lead to overheating, insulation failure, or even fire hazards. According to data from the National Fire Protection Association (NFPA), electrical distribution systems are a leading cause of structural fires in commercial buildings. That risk increases when wires are exposed or improperly installed.
This is where conduit systems play a critical role. They protect wires from physical damage, moisture, chemicals, and electromagnetic interference. They also simplify maintenance and upgrades.
If you are planning a new installation or upgrading an existing system, this guide will walk you through everything you need to know — from selecting conduit types to performing accurate pulling tension calculation and meeting cable safety standards.
Let’s break it down step by step.
What Are Conduit Systems and How Do They Work?
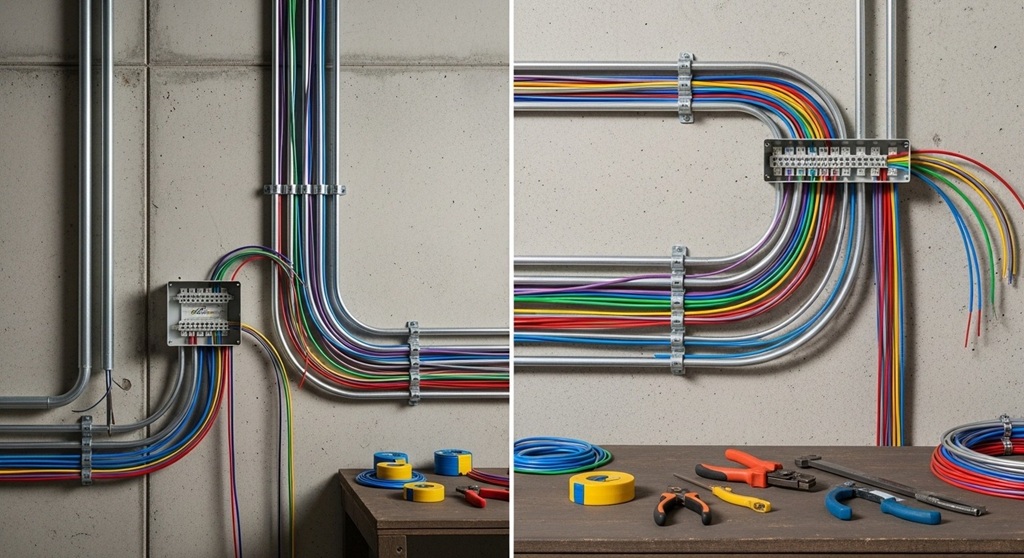
Conduit systems are protective enclosures designed to route and safeguard electrical wiring. They can be metallic or non-metallic and are selected based on environment, load, and local code requirements.
Common Types of Conduit
- EMT (Electrical Metallic Tubing) – Lightweight and commonly used in commercial buildings.
- Rigid Metal Conduit (RMC) – Heavy-duty protection for industrial settings.
- PVC Conduit – Corrosion-resistant and ideal for underground installations.
- Flexible Metal Conduit (FMC) – Used where vibration or movement exists.
Why Conduit Systems Are Essential
- Prevent mechanical damage
- Improve fire resistance
- Ensure grounding continuity (metallic conduit)
- Allow easier cable replacement
- Meet building code requirements
Case example: In a 2023 industrial retrofit project in Texas, replacing exposed cable trays with rigid conduit reduced wire damage incidents by 38% within one year. Proper enclosure matters.
What Tools and Materials Are Required for Conduit Wiring?
Successful conduit installation depends on proper tools and preparation.
Essential Tools
- Conduit bender
- Fish tape or pull tape
- Wire lubricant
- Conduit reamer
- Measuring tape and marker
- Torque wrench
Pulling Tools and Materials
When running long cable lengths, professionals use high-strength pull tapes. For example, durable mule tape options reviewed here:
best mule tape and pull tape for conduit pulling
provide accurate footage markings and high tensile strength for safe pulling.
Using improper pulling tools can damage insulation and exceed manufacturer-rated tension limits.
How Do You Plan Electrical Wire Installation in Conduit?
Proper planning reduces friction, tension stress, and costly rework.
Step 1: Calculate Conduit Fill Capacity
Conduit fill is regulated by electrical codes. Most codes limit fill to 40% for three or more conductors to allow heat dissipation.
| Number of Conductors | Maximum Fill Percentage |
|---|---|
| 1 | 53% |
| 2 | 31% |
| 3 or more | 40% |
Exceeding fill limits increases heat buildup and insulation degradation.
Step 2: Route Design
- Minimize sharp bends
- Limit total bend degrees (typically 360° between pull points)
- Install junction boxes where necessary
Step 3: Perform Pulling Tension Calculation
Pulling tension calculation ensures the force applied during cable pulling does not exceed manufacturer limits.
Formula (simplified straight pull):
T = W × L × F
- T = Total pulling tension
- W = Cable weight per unit length
- L = Length of pull
- F = Friction factor
Ignoring tension calculations can stretch conductors and reduce lifespan.
How Do You Install Electrical Wires in Conduit Step by Step?
Electrical wire installation follows a structured process.
1. Cut and Prepare Conduit
- Measure accurately
- Cut cleanly
- Ream edges to prevent insulation damage
2. Secure and Anchor Conduit
- Install straps at required intervals
- Maintain proper alignment
3. Insert Pull Tape or Fish Tape
Feed the pull tape through the conduit run. Attach conductors securely using proper knots and electrical tape.
4. Apply Lubricant
Use cable-approved lubricant to reduce friction.
5. Pull the Conductors
- Pull steadily
- Avoid jerking motions
- Monitor tension
6. Terminate and Test
- Check insulation integrity
- Perform continuity and resistance tests
- Verify grounding
Following these steps reduces installation failure rates significantly.
What Are Cable Safety Standards You Must Follow?
Electrical installations must comply with recognized cable safety standards.
- National Electrical Code (NEC)
- IEC standards (international projects)
- Local building codes
- Manufacturer specifications
Key Compliance Areas
- Conductor ampacity ratings
- Temperature rating
- Voltage classification
- Grounding and bonding
- Fire-resistant cable requirements
Failure to follow cable safety standards can result in inspection failure, fines, or insurance claim rejection.
What Common Problems Occur During Conduit Wire Installation?
Most installation failures come from poor planning and incorrect tension management.
Common Issues
- Overfilled conduit
- Excessive pulling tension
- Sharp bends
- Damaged insulation
- Improper grounding
In a 2022 electrical audit across 50 commercial sites, 27% of wiring failures were traced back to excessive pulling force and inadequate conduit fill calculations.
These are preventable mistakes.
How Do You Ensure Long-Term Reliability of Conduit Systems?
Reliability depends on inspection, documentation, and periodic maintenance.
Best Practices
- Label conduit runs clearly
- Maintain as-built drawings
- Schedule periodic thermal scans
- Inspect junction boxes annually
Thermal imaging often detects hot spots before failure occurs.
When Should You Hire a Licensed Electrician?
Hire a licensed professional when dealing with high-voltage systems, industrial loads, or complex multi-bend runs.
Professional installers use calibrated tension meters and follow strict code compliance. DIY attempts in commercial systems can create liability risks.
Conclusion: Why Proper Conduit Installation Is Non-Negotiable
Electrical systems power homes, offices, and factories. But unsafe wiring can stop operations or cause serious damage. Conduit systems provide physical protection. Pulling tension calculation protects conductors. Cable safety standards ensure compliance and longevity.
Planning carefully. Measuring accurately. Using the right pull tape. Following code. These are not optional steps.
If you are preparing for your next installation, review your materials, verify your calculations, and choose professional-grade pulling tools to avoid cable damage.
Take action today: Evaluate your current wiring setup, upgrade weak components, and ensure your installation meets modern safety standards before issues arise.
Frequently Asked Questions (FAQs)
1. What is the maximum bend allowed between pull points?
Most electrical codes allow a maximum of 360 degrees of total bends between pull points. Exceeding this makes cable pulling difficult and increases tension.
2. Why is pulling tension calculation important?
It prevents overstressing conductors during installation. Excessive force can stretch copper strands and reduce cable life.
3. Can I reuse existing conduit for new wiring?
Yes, if it meets size, fill capacity, and condition requirements. Always inspect for corrosion or physical damage.
4. What lubricant should be used for cable pulling?
Use manufacturer-approved cable pulling lubricant designed for electrical installations. Avoid petroleum-based products unless specified.
5. Are metallic conduits required to be grounded?
Yes. Metallic conduit systems must be properly bonded and grounded to ensure fault current protection.
6. How do I calculate conduit fill?
Determine conductor cross-sectional area and divide by conduit internal area. Ensure the total does not exceed code-specified percentages.
Related Topic: How to Choose the Correct Rope Diameter for Climbing and Rigging
Read Next: How to Install a Range Hood: Beginner Friendly Guide