


Growing potatoes in bags is an awesome way to get a productive crop in a small space. Potato bags are for you if you’re tight on space or want an easy way to grow spuds without tilling up part of your yard!
In this complete guide, I’ll walk you through everything you need to know about using potato grow bags, from picking the right bag material to prepping and filling the bags to caring for your plants throughout the growing season. Let’s dig in!
Why Grow Potatoes in Bags?
There are a few key reasons to grow spuds in bags rather than directly on the ground:
- Limited space: Bags let you grow many potatoes in a small area. Even if you only have room for a couple of bags on an apartment patio or balcony, you can still harvest pounds of potatoes.
- Portability: Potato bags allow you to move your crop around to get the light and space you need. Drag them into the sun or stack them on shelves to maximize your footprint.
- No digging required: With bags, there’s no need to till up soil in your yard or allotment space to plant potatoes. Just set the bags in place, and you’re good to go!
- Less weeding and maintenance: Weeds are minimal when using containment bags. And since the potatoes grow in the container, you don’t have to hill the soil up around spreading plants.
- Earlier harvests: Enclosed bags help trap heat and warm the soil, allowing you to get a head start on the season. I find my bagged potatoes are ready a few weeks before they are planted in the ground.
- Good for beginners: Potato bags offer a simple, low-commitment way to try your hand at growing potatoes for the first time without much work.
With so many upsides, it’s easy to see why more and more home growers are using potato bags!
Choosing a Grow Bag

Potato bags come in a variety of materials, sizes, and styles these days. Here are the main options:
Grow Bag Materials
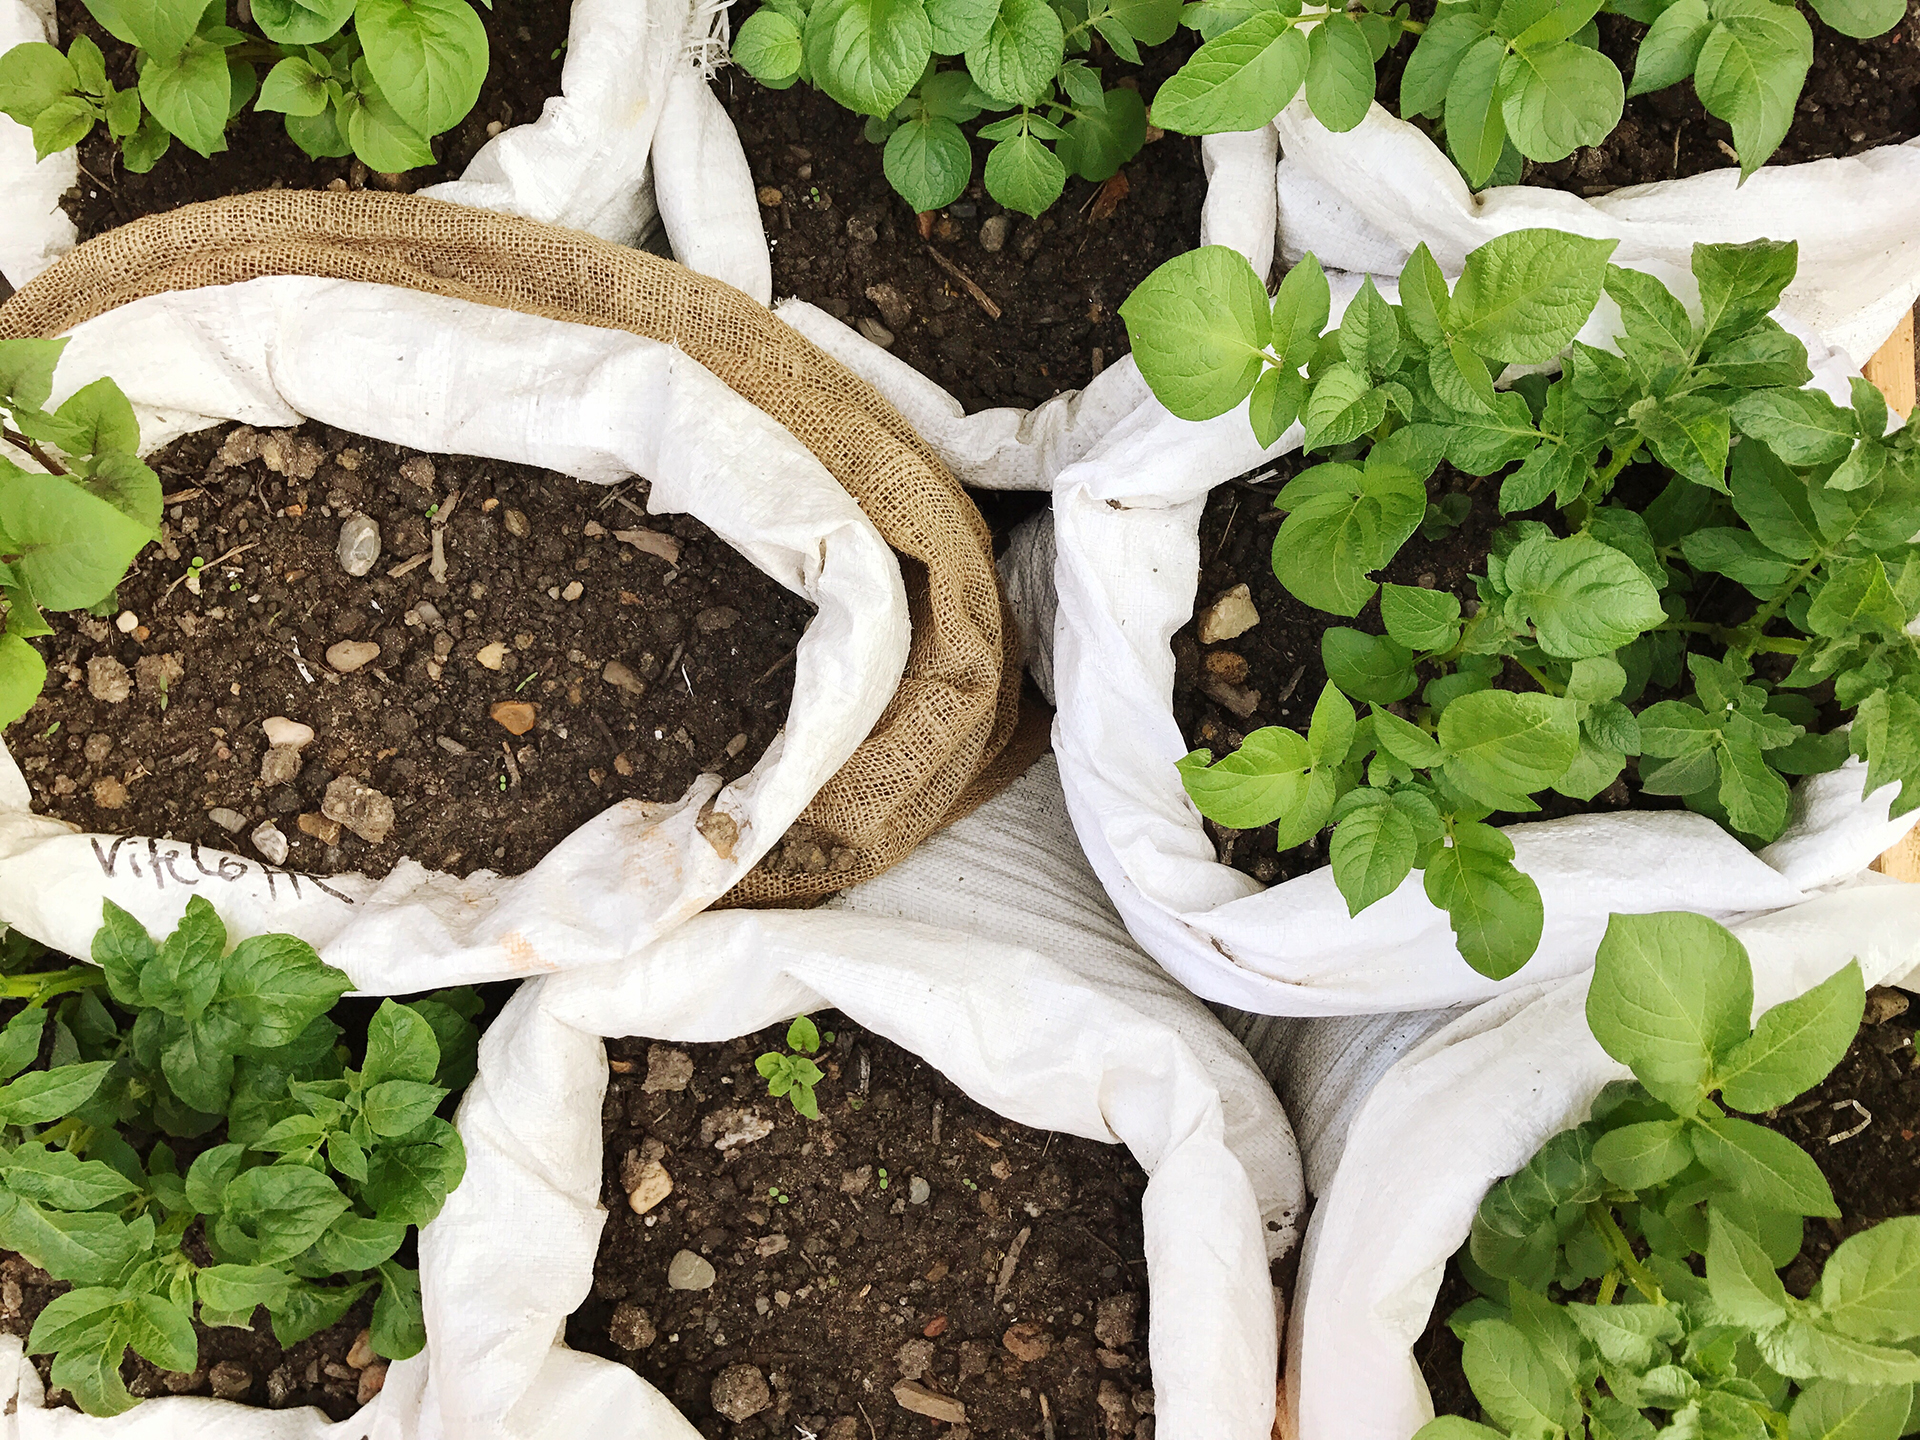
- Burlap: Sturdy and breathable, burlap is a classic choice. It’s affordable but will only last 1-2 seasons before needing replacement.
- Polypropylene: Woven polypropylene bags have good durability and drainage. This type will last many seasons with proper care.
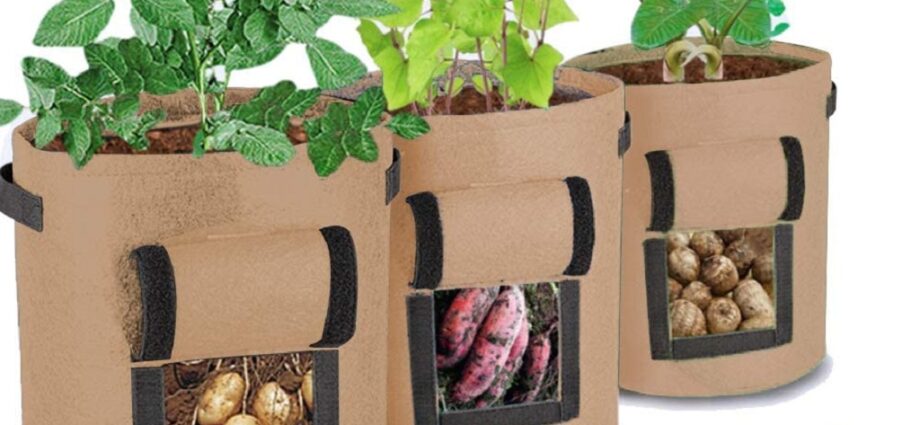
- Fabric: Potato bags also come in felt or fabric materials. These tend to be thinner but offer interesting patterns and colors.
- Trash bags or bin liners: For a budget-friendly choice, some gardeners use heavy-duty trash bags. These won’t last long but can work in a pinch.
I prefer to invest in a good-woven polypropylene or burlap bag that will stand up to years of use.
Grow Bag Sizes
Bags come in sizes from 3-100+ liters. The smaller 3-5-liter bags are good for patios and balconies with limited room. 10 liters and up are best for serious production. I’d suggest a 30- to 45-liter bag as a happy medium for most home growers.
Bag Styles
You’ll also see vertical “tube”-“-style bags and more horizontal saddle-shaped bags. I find the horizontal style easier to fill, water, and harvest. But vertical bags are great when you must pile multiple bags on racks or shelves.
Test out different options to see what you like best! The inline bags with handles also make moving and stacking easier.
Preparing Your Potato Grow Bags

Once you’ve got your grow bags, there are a few key steps to prep them before planting:
1. Check for holes.
Inspect new and used bags thoroughly to ensure no small tears or holes. Patch any holes you find with duct tape. Holes invite pests and cause potatoes to push through.
2. Disinfect used bags.
If you are reusing bags from prior seasons, do a quick bleach and water disinfection. Mix 1 part bleach with 9 parts water and scrub the empty bags. This kills any bacteria or pathogens left over. Rinse and dry well before refilling.
3. Layer the bottom.
Put 2-3 inches of compost, leaves, straw, or other organic material in the bottom of the bag. This improves drainage and moisture retention.
4. Fill with soil.
Top off your bags with a quality potting soil mix. Don’t pack it down too firmly. Leave about 5 inches from the soil to the top rim of the bag.
5. Consider adding amendments.
Mixing in a balanced fertilizer, mycorrhizal fungi, kelp meal, or other amendments can enrich your soil. But for beginners, a potting mix alone will suffice.
Choosing Seed Potatoes
Now comes the fun part—picking your seed potato varieties! Here are some factors to keep in mind:
- Types: Potatoes are grouped by maturity time: early season, midseason, and late season varietals. Choose a mix to get a continuous harvest.
- Days to maturity: early spuds take 60–70 days, midseason 80–90 days, late 100+ days. Check the days to maturity to plan your planting schedule.
- Yield: Some varieties produce more prolifically than others. Check catalog descriptions to pick high-yielding types like Russet Burbank, Kennebec, Yukon Gold, etc.
- Use: fluffy or waxy? All-purpose or for baking, frying, or boiling? Pick varieties suited to how you plan to use your potatoes.
- Pest/disease resistance: Some spuds are bred for resistance to common potato blights, leafhoppers, and other issues. This can reduce maintenance.
- Size: Do you want small creamer potatoes or big baking spuds? Size varies greatly between types.
- Flavor: Of course, taste is key! Choose the varieties you find tastiest.
Don’t be afraid to experiment with different types each season to find new favorites. For beginners, I suggest starting with a trio of early, mid, and late-season potatoes.
Planting Your Seed Potatoes
Planting Day is finally here! Follow these steps when placing your seed potatoes:
1. Let potatoes sprout.
You’ll get faster growth if you pre-sprout your seed potatoes. Keep whole tubers in a sunny spot at 60–70°F for 2–3 weeks until sprouts appear.
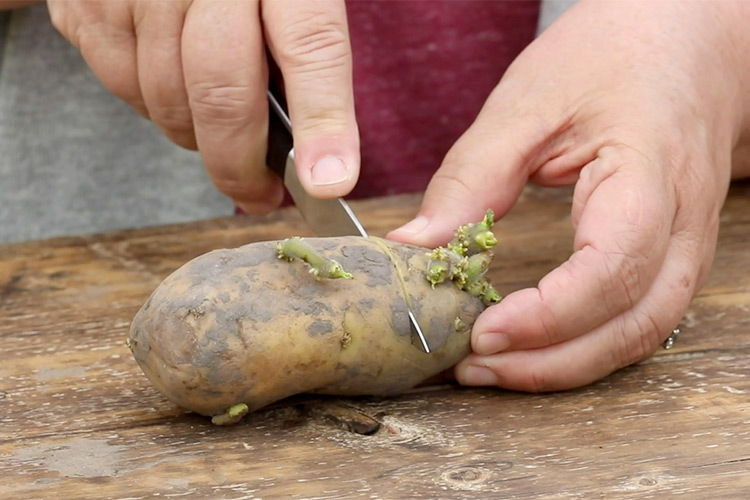
2. Cut into pieces.
When ready to plant, cut large tubers into smaller pieces. Each should have 1-3 strong sprouts (“eyes”). Discard any shriveled or discolored parts.
3. Plant pieces 4-6 inches deep.
Dig 4-6 inch-deep holes in the soil-filled bags. Gently place the cut potato pieces in, with the sprouts facing up. Cover loosely with soil.
4. Space evenly.
Plant the pieces every 8–12 inches and spread them out over the bag’s surface. This gives them room to grow underground.
5. Label bags.
Use tags, markers, or labels to note the variety in each bag. This prevents mixing up types when harvesting.
6. Water well.
Water thoroughly after planting to moisten the soil and help spur sprouting. Then let the soil dry out a bit before your next watering.
And that’s it—now watch your sprouts start shooting up!
Caring for Your Potato Plants
Tending your potato bags from planting through harvest is easy.
Sunlight and warmth
Potatoes need at least 6–8 hours of sun daily. Warmth is key too, ideally 60–80 °F. Moving bags to track the sunlight can help.
Watering
The soil should be kept moist but not soggy. Use your finger to gauge moisture an inch down. Water when the top inch feels just dry.
Fertilizing
Apply a balanced liquid fertilizer or compost or manure tea every 2-3 weeks during the growing season. This nourishes plants for bigger yields.
Aerating Soil
Gently plunge your hand or a trowel into the soil to aerate every week or two. This allows oxygen to circulate to the roots.
Avoid Flowering
Nip any flowers that appear in the bud stage. Letting plants flower diverts energy from tuber production underground.
Watch for pests
Keep an eye out for common bugs like aphids, potato beetles, and leaf hoppers. Remove by hand or use organic insecticidal soap as needed.
Hilling More Soil
As plants get larger, add more loose soil around the stems as needed to cover the spreading lower leaves. This allows more tubers to form.
Harvesting your crop
Once potato plants start yellowing and dying back, your tubers are ready for harvesting.
1. Check Days to Maturity
Harvest early-season varieties after 60–70 days, mid-season after 80–90 days, and late-season after 100+ days from planting.
2. Test Dig
Dig carefully around the edge of the bag to remove 1-2 sample potatoes. Check their size.
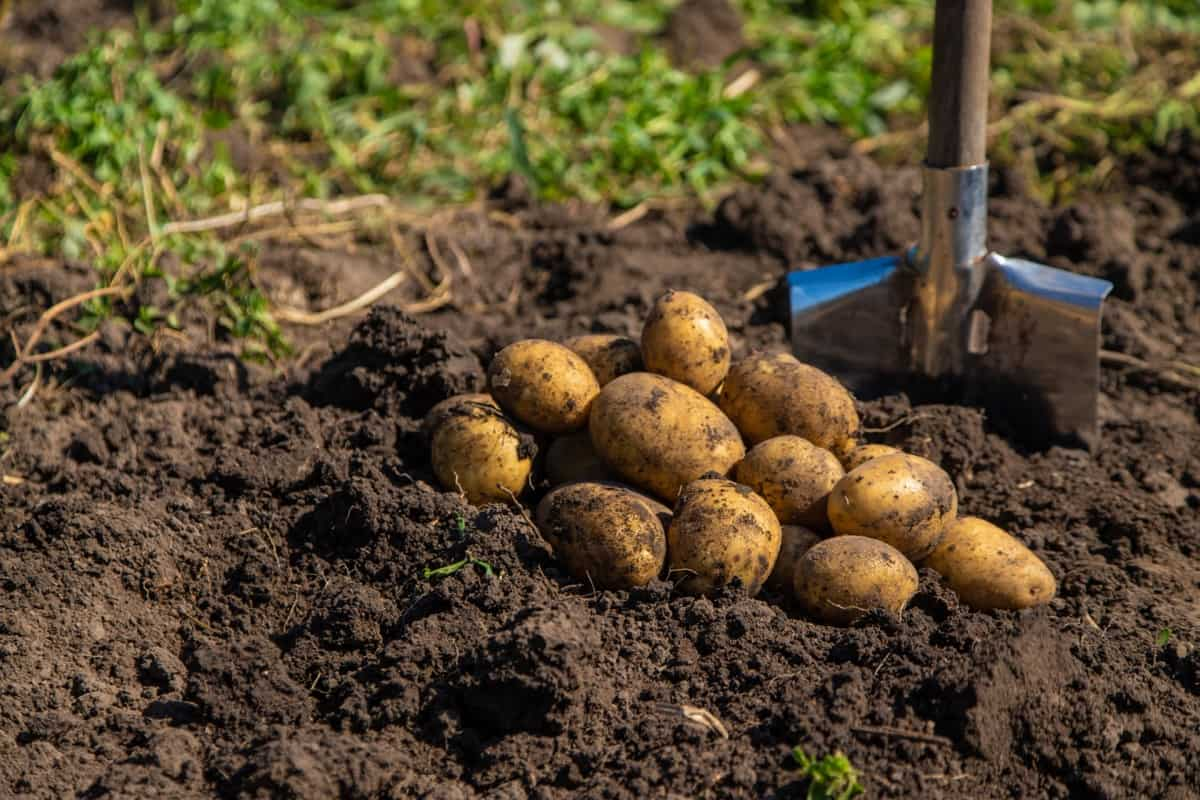
3. Harvest when tubers reach the desired size.
Once the test spuds are 2–3 inches or bigger, go ahead and harvest. Carefully dump out a bag onto a tarp to collect the potatoes as you unearth them.
4. Curing potatoes
Let the harvested potatoes sit in the open air for 1-2 weeks to cure. This thickens skins for better storage.
5. Storing the crop
When cured, move the potatoes to breathable containers or mesh bags. Store in a cool, dark spot around 40–50°F for the longest life.
Enjoy the fruits of your labor! Homegrown potatoes from your own bags are hard to beat.
Troubleshooting Issues
Of course, problems can pop up at any time when gardening. Here are some common potato bag issues and fixes:
Leggy, weak plants: Lack of sun. Move bags or prune leaves to allow more light penetration.
Flowers or a few tubers: Shift bags to a cooler spot or pinch off flowers.
Holes in leaves: Pests like potato beetles. Remove it by hand or use organic insecticide.
Wilting: Under or overwatering. Check soil moisture and adjust watering habits.
Green tubers: Sun exposure. Completely cover potatoes with soil or mulch as they grow.
Rotting tubers: Too much moisture. Improve drainage and let the soil partially dry before watering.
Small yields: Insufficient nutrients. Fertilize plants more or use richer soil next time.
Top 5 Tips for Potato Bag Success
Here are my best bits of wisdom after growing spuds in bags for years:
- Select quality potato varieties for your space, meal plans, and climate.
- Start with nutrient-rich soil and fertilize regularly for vigorous plants and bountiful harvests.
- Consistent moisture is key; potatoes need moist soil but still have some air pockets.
- Give plants at least 6 hours of sunlight daily by moving or rotating bags to follow the sun.
- Hill up extra soil around the base as needed to keep developing tubers covered.
Follow these tips, and you’ll enjoy an abundant potato crop this season!
Frequently Asked Questions
1. What size potato grow bag is best?
For most home gardeners, 20–45-liter bags are ideal. This provides enough space for solid yields but is still a manageable size.
2. How many seed potatoes do I need per bag?
On average, there are 4-5 seed potato pieces per 20–30-liter bag. Up to 10 pieces can be planted in larger bags.
3. How often should I water potato grow bags?
Check soil moisture about an inch down daily, and water when the top inch dries. Avoid oversaturating.
4. What’s the best soil mix to use in potato bags?
A good potting soil labeled for vegetables works perfectly. Or make your own mix of compost, peat, and perlite.
5. Can I grow potatoes in plastic trash bags?
Heavy-duty trash bags can work in a pinch but aren’t ideal as they tend to tear easily. Reusable fabric or woven poly bags are best.
Conclusion
Growing potatoes in bags is one of the most fun and space-saving ways to grow your own spuds. With the right bags, soil, and care, you can harvest pounds of homegrown potatoes anywhere from a fire escape to a suburban yard.
The Ultimate Guide to Heavy Duty Garden Rakes equips you with essential knowledge on choosing the right tool for a well-maintained garden and complements your gardening expertise. I hope this complete guide gave you all the tips and tricks you need for potato growing success this season. The process is easy and rewarding, just like the reliable heavy-duty garden rake recommended in this comprehensive manual. Don’t be afraid to experiment with different bag materials, potato varieties, and growing methods to enhance your gardening experience further.
Soon you’ll be harvesting crunchy new potatoes and keeping your kitchen stocked with homegrown goodness all season. Get those bags prepped and enjoy the journey from planting to a productive potato harvest!