


To level an uneven floor for wood flooring shingles, use underlayment, floor leveler, or floor patch products to fix low spots in the subfloor. These materials help smooth out the floor, provide insulation, absorb sound, reduce wear, and can even serve as a vapor barrier.
For concrete surfaces, sanding and polishing may be necessary. Additionally, underlays and re-surfacing techniques can be used to properly install hardwood on uneven flooring. By following these steps, you can create a leveled base for your wood flooring shingles, ensuring a beautiful and sturdy end result.
Preparing For Wood Flooring Shingles
To level an uneven floor for wood flooring shingles, start by identifying the low spots and filling them with a self-leveling compound. Ensure the subfloor is clean, stable, and moisture-free before laying down an underlayment for insulation and sound absorption.
Resurfacing and sanding may be necessary for concrete surfaces.
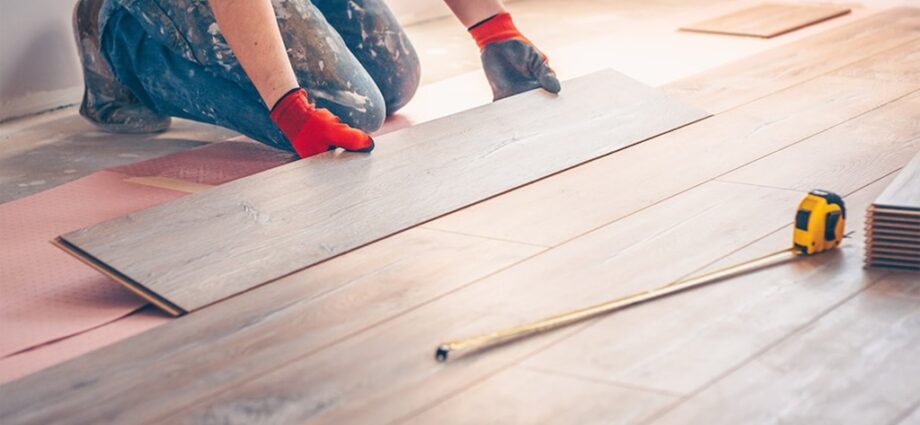
Using Underlayment
Underlayment is a crucial step when preparing for wood flooring shingles on uneven floors. It provides a smooth and stable surface for the wood to be installed on, ensuring a long-lasting and level result. Underlayment is typically made of a thin layer of material that is sandwiched between two other materials. It offers several benefits, such as insulation, sound absorption, and reducing wear on the floor. Moreover, it can also act as a vapor barrier, protecting your wood flooring from moisture damage.
Smoothing Out The Subfloor
For a proper installation of hardwood on an uneven floor, it’s essential to smooth out the subfloor. This can be achieved through the use of underlays and resurfacing techniques. In the case of concrete surfaces, sanding or applying a self-leveling compound can help create a level base for the wood flooring. For wooden subfloors, it may be necessary to address any unevenness or dips by using shims or adding additional layers of plywood to create a level surface. Smoothing out the subfloor is crucial to ensure your wood flooring shingles are installed evenly and provide a durable and stable foundation for your floor.
By following these steps and properly preparing for wood flooring shingles, you can achieve a level and beautiful result. Using underlayment provides insulation, sound absorption, and protection against moisture. Smoothing out the subfloor ensures that your wood flooring is installed on a stable and level surface. Now that you have a solid foundation, you can proceed with the installation of your wood flooring shingles, knowing that they will be secure and long-lasting.
Leveling Techniques
Learn the best techniques for leveling an uneven floor before installing wood flooring shingles. From underlayments to floor levelers, discover the steps to create a smooth surface for your new flooring. Ensure a professional and flawless finish for your wood floor installation.
When it comes to installing wood flooring shingles, it’s essential to have a level and even floor. Uneven floors can cause problems with the installation, affect the durability of the flooring, and even lead to structural issues in the long run. To ensure a smooth and successful wood flooring installation, here are two effective leveling techniques you can use: applying asphalt shingles and using a floor leveler.
Applying Asphalt Shingles
Applying asphalt shingles is a commonly used technique to level uneven floors. It involves placing layers of asphalt shingles on the subfloor where there are low spots or uneven areas. These shingles act as a filler, providing a stable and flat surface for the wood flooring.
To apply asphalt shingles, follow these steps:
- Start by cleaning the subfloor thoroughly and removing any debris or loose material.
- Cut the asphalt shingles into smaller pieces or strips to fit the size of the low spots or uneven areas.
- Apply a layer of adhesive or construction adhesive on the subfloor where you will place the shingles.
- Place the cut asphalt shingles on the adhesive, ensuring they are snugly fitted and cover the entire uneven area.
- Press down on the shingles to ensure they adhere well to the subfloor.
- Allow the adhesive to dry completely before proceeding with the wood flooring installation.
Using asphalt shingles is an effective and affordable way to level an uneven floor, providing a firm foundation for your wood flooring shingles.
Using Floor Leveler
If you’re dealing with a more significant level discrepancy, using a floor leveler can be an ideal solution. Floor levelers are self-leveling compounds that are specifically designed to even out uneven floors.
Here’s how you can use a floor leveler:
- Prepare the subfloor by cleaning it thoroughly and removing any debris or loose material.
- Fill any large cracks or deep depressions with a patching compound and allow it to dry.
- Mix the floor leveler according to the manufacturer’s instructions, ensuring you achieve the desired consistency.
- Pour the floor leveler onto the uneven areas, starting from the lowest spot and working towards the higher areas.
- Spread the floor leveler evenly using a trowel or a leveling tool.
- Allow the floor leveler to dry and cure completely, following the manufacturer’s recommended drying time.
- Once dry, the floor will be level and ready for the installation of the wood flooring shingles.
Using a floor leveler provides a smooth and even surface, ensuring a successful wood flooring installation.
Dealing With Uneven Floors
When preparing to install wood flooring shingles, one of the primary concerns is dealing with uneven floors. Uneven floors can cause problems with the installation and affect the overall look and durability of the flooring. However, there are several effective methods for leveling uneven floors to ensure a smooth and flawless wood flooring installation.
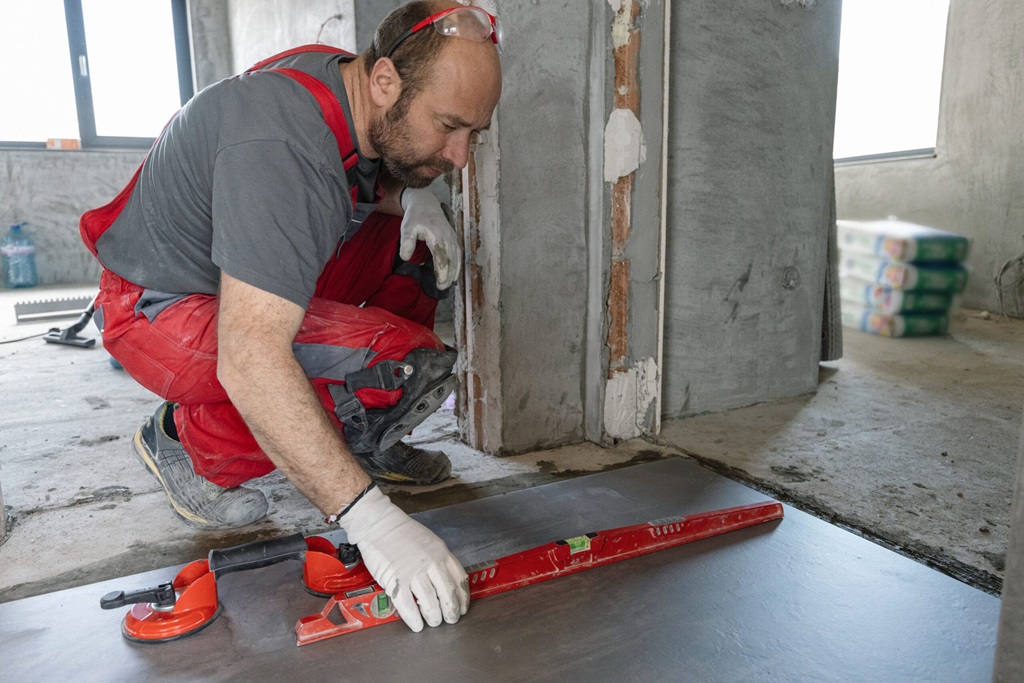
Sanding And Polishing
Sanding and polishing the uneven surface is a popular method for leveling floor plans before installing wood flooring. This process involves removing the high points of the floor and smoothing out the surface to create a more even base for the wood shingles. It’s essential to use proper safety equipment and follow the manufacturer’s guidelines when sanding and polishing the floor to achieve the desired level.
Installing Plywood For Leveling
Another effective approach for leveling uneven floors is to install plywood over the existing subfloor. This method involves laying plywood sheets over uneven areas to create a level surface for the wood flooring installation. It’s crucial to ensure the plywood is securely fastened and leveled to prevent any movement or shifting once the wood shingles are laid.
Step-by-step Guide
Learn how to level an uneven floor for wood flooring shingles with this step-by-step guide. From using underlayment and floor levelers to sanding and polishing, these techniques will help you achieve a smooth and even surface for your wood flooring installation.
Choosing The Right Method
Before leveling an uneven floor for wood flooring shingles, it’s crucial to choose the right method that suits your specific needs.
Here are a few options to consider:
- Underlayment: Using an underlayment is one of the most common methods to level a floor. It involves placing a thin layer of material between the subfloor and the wood flooring shingles. This not only helps to smooth out any uneven areas but also provides insulation, and sound absorption, and reduces wear.
- Floor Leveler: If you have significant low spots on your floor, using a floor leveler can help. This product is specially designed to fill in uneven areas and create a smooth surface. It can be applied to both wood and concrete subfloors.
- Floor Patch Product: For minor unevenness, a floor patch product may be sufficient. This is a quick-fix solution that helps to level out small imperfections in the floor. It can be applied directly to the affected areas.
Executing The Leveling Process
Once you’ve chosen the right method for leveling your uneven floor, follow these step-by-step instructions to ensure a successful process:
- Prepare the Subfloor: Start by thoroughly cleaning the subfloor and removing any debris or obstacles. This will create a clean surface for the leveling process.
- Apply Underlayment or Leveler: Depending on the method you’ve chosen, carefully follow the manufacturer’s instructions to apply the underlayment or floor leveler. Make sure to spread it evenly across the floor, paying extra attention to the uneven areas.
- Smooth and Level: Use a trowel or a leveling tool to smooth and level the applied material. Ensure that the surface is even and flat, removing any excess material as needed.
- Allow it to Cure or Dry: Give the underlayment or leveler sufficient time to cure or dry, as indicated by the manufacturer. This will ensure that it properly sets and provides a stable base for your wood flooring shingles.
- Install the Wood Flooring: Once the leveled surface is ready, follow the recommended installation process for your wood flooring shingles. This typically involves laying the shingles, securing them properly, and ensuring a tight fit.
- Finishing Touches: After the installation is complete, make sure to finish off the edges and transitions between different areas of flooring. This will give your floor a polished and professional look.
By following these step-by-step instructions and choosing the right leveling method, you can successfully level an uneven floor for wood flooring shingles, ensuring a smooth and beautiful final result.
Common Challenges And Solutions
To level an uneven floor for wood flooring shingles, utilize underlayment, floor leveler, or floor patch products to fix low spots in the subfloor. For concrete surfaces, sanding and polishing can smooth out the floor, while for wooden subfloors, the use of underlays and re-surfacing is an effective method for smoothing uneven surfaces.
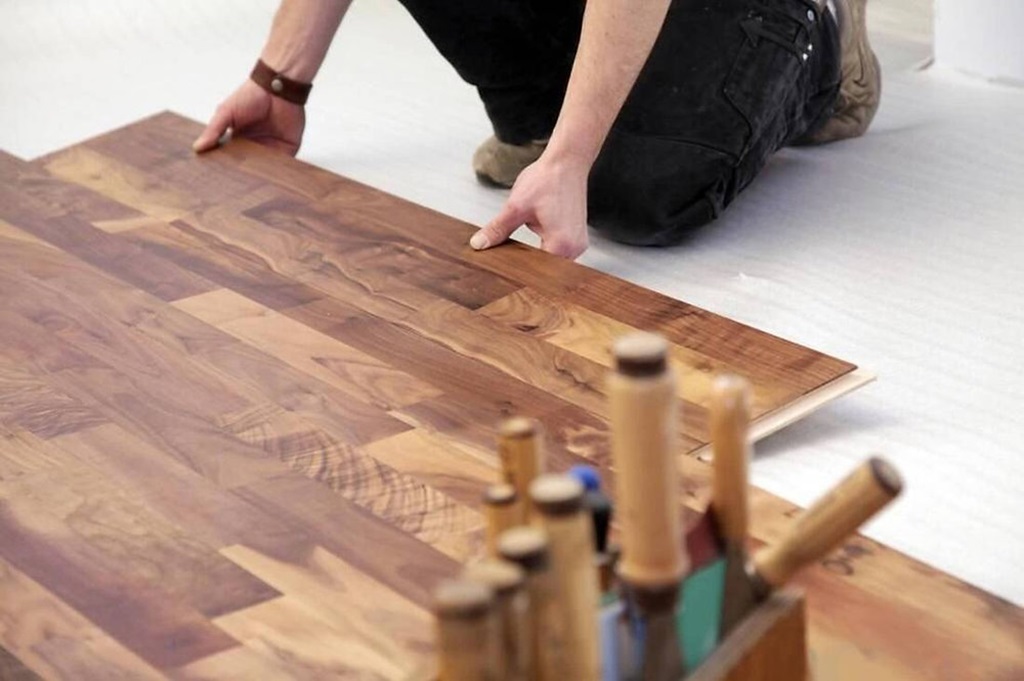
Addressing Low Spots
If you’re dealing with an uneven floor, one of the most common challenges you’ll face is addressing low spots. These low spots can cause problems when installing wood flooring shingles, as they can create an uneven base and potentially lead to gaps and unevenness in the finished floor.
To address low spots, there are a few solutions you can consider. One option is to use an underlayment, which is a thin layer of material that is placed between the subfloor and the wood flooring. The underlayment helps to smooth out any irregularities in the subfloor, providing a more level surface for the wood flooring shingles. Additionally, underlayments can provide insulation, absorb sound, and act as a vapor barrier.
Another solution for addressing low spots is to use a floor leveler or floor patch product. These products are specifically designed to fill in low areas of the floor, creating a more even surface. Floor levelers and floor patches come in different forms, such as self-leveling compounds or pourable fillers, and can be tailored to the specific needs of the floor.
When using an underlayment or floor leveler, it’s essential to follow the manufacturer’s instructions carefully to ensure proper installation and long-term stability of the floor.
Ensuring Long-term Stability
Ensuring long-term stability is crucial when leveling an uneven floor for wood flooring shingles. After addressing any low spots, it’s important to take additional steps to ensure that the floor remains level and stable over time.
One way to ensure long-term stability is to properly prepare the subfloor before installing the wood flooring shingles. This may involve sanding down any high spots, removing loose or damaged sections, and repairing any cracks or imperfections. By creating a smooth and solid subfloor, you provide a solid foundation for the wood flooring shingles and minimize the risk of future problems.
Another consideration for long-term stability is the choice of wood flooring shingles. It’s important to select a high-quality, durable product that is designed to withstand the demands of your specific space. Additionally, following recommended installation techniques, such as proper adhesive application and acclimation of the wood flooring shingles to the environment, can help ensure long-term stability.
By addressing low spots and ensuring long-term stability, you can create a level surface for your wood flooring shingles, resulting in a beautiful and durable finished floor.
Conclusion
Achieving a level surface for wood flooring shingles requires using underlayment, floor leveler, or floor patch products to address low spots in the subfloor. The use of underlays and resurfacing can smooth out uneven concrete surfaces, ensuring a stable foundation for the wood flooring installation.
When done properly, this process ensures a beautiful and durable final result for your wood flooring project.
Frequently Asked Questions On How To Level A Uneven Floor For Wood Flooring Shingles
What Is The Best Way To Level An Uneven Wood Floor?
To level an uneven wood floor, use an underlayment, floor leveler, or floor patch product. These methods fix low spots in the wood or concrete subfloor and help insulate, absorb sound, and reduce wear on your floor. They can also serve as a vapor barrier.
How Do You Install Wood Flooring On An Uneven Floor?
To install wood flooring on an uneven floor, you can use underlays, re-surfacing, or sanding and polishing for concrete surfaces. For a subfloor, you can level it by using plywood. With the right techniques, plywood can help level the floor and create a welcoming space.
How Do You Level A Subfloor For Plank Flooring?
To level a subfloor for plank flooring, use an underlayment, floor leveler, or floor patch product to fix low spots and smooth out the surface. Ensure the subfloor is even for proper installation. Sanding, polishing, and using plywood can also help level a subfloor for plank flooring.
Can I Plywood On Top Of Uneven Floor To Level?
Yes, you can level an uneven floor by using plywood. Follow this step-by-step guide to ensure a well-designed and even surface.