


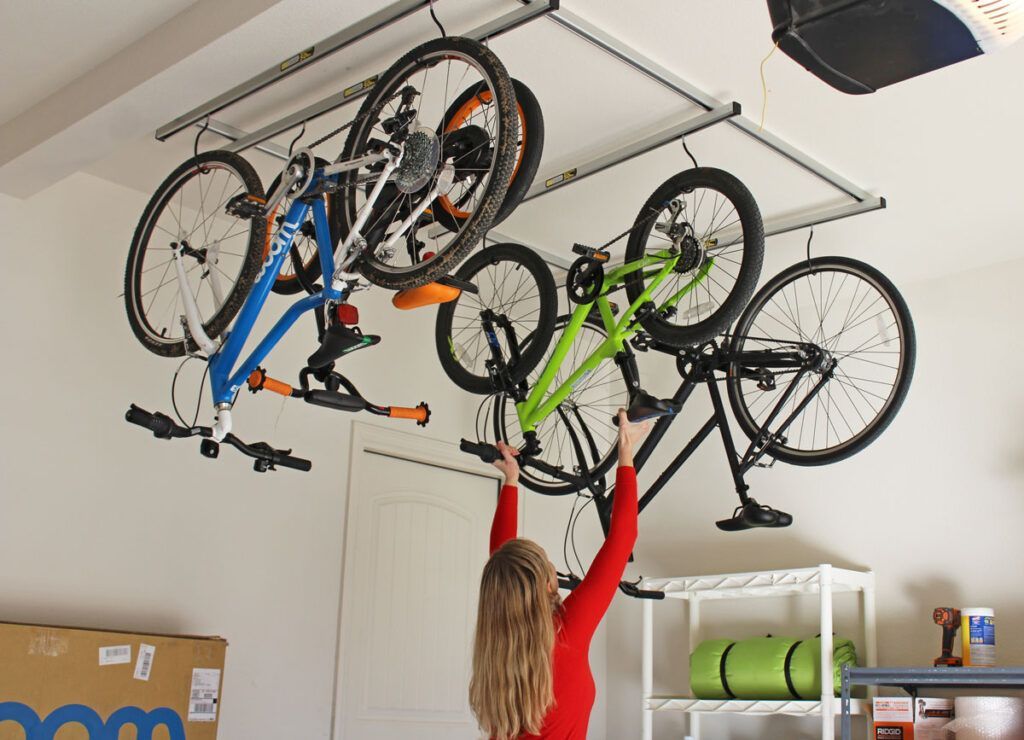
Having a cluttered and disorganized garage can be frustrating. You likely have tools, sporting equipment, gardening supplies, and more jammed into every nook and cranny. While it may seem impossible to get your garage organized, installing wall mounted storage hooks can work wonders. Wall mounted hooks allow you to efficiently utilize vertical space in your garage to get items up and off the floor. This opens up valuable floor space for vehicles, workbenches, and other necessities. With the right placement and hook choice, you can create an organized garage that makes finding what you need a breeze.
In this guide, I’ll walk you through the complete process of choosing, buying, and installing wall mounted storage hooks in your garage. By the end, you’ll know to create a personalized wall storage system that organizing experts would envy. Let’s get started!
Choosing the Right Wall Mounted Storage Hooks

The first step is selecting the proper hooks to meet your storage needs. Here are the main factors to consider when choosing garage wall hooks:
Types of Hooks
There are a variety of hook styles to choose from:
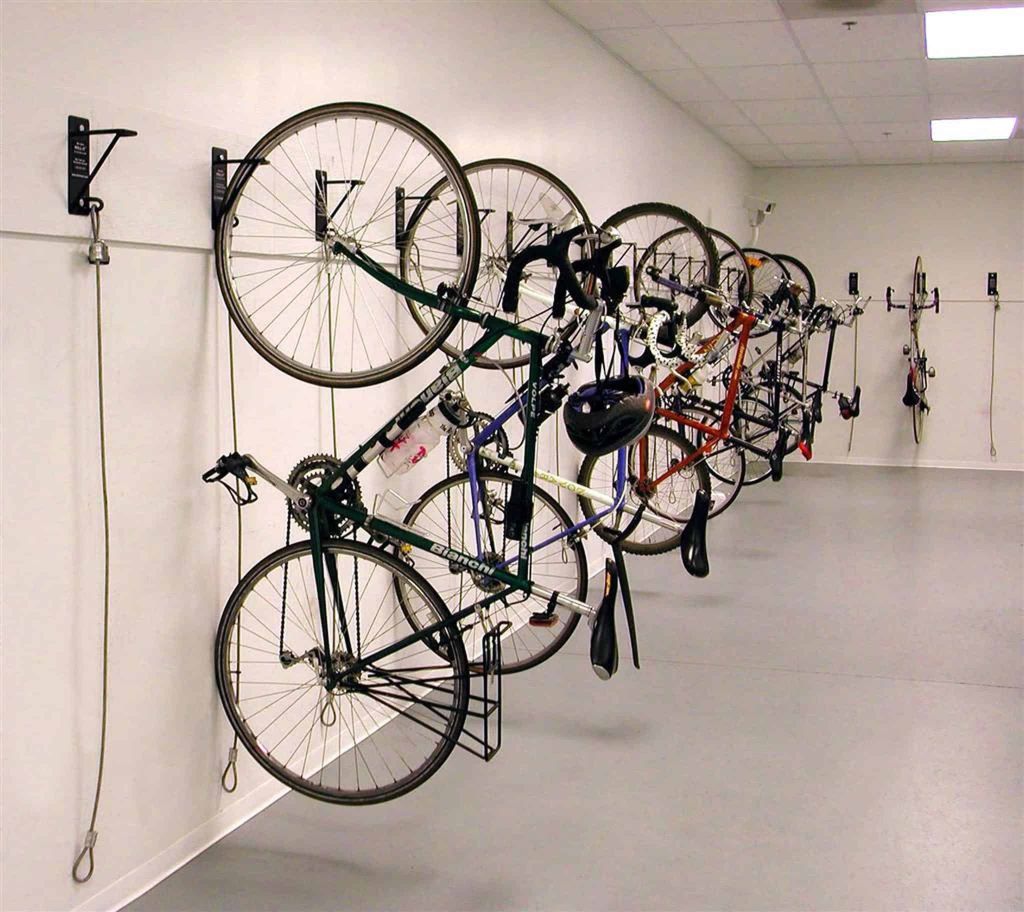
- J-Hooks: Basic rounded hook shape. Best for lighter items like tools or jackets.
- Angled Hooks: Similar to J-hooks but with a tilted arm. Allow items to hang easier.
- Double Hooks: Two hooks joined together. Great for pairs of items like shoes.
- Shelf Hooks: Have a flat shelf below the hook to hold items. Perfect for sporting goods or power tools.
- Cable Hooks: Designed to neatly hold cables, ropes, and hoses. Keep extension cords untangled.
- Tool Holders: Have multiple hooks, clips, or slots for storing groups of tools in one place. Keeps similar items together.
Consider which hook types make the most sense for the kinds of items you’ll be storing. Mixing different hooks gives you options.
Load Capacity
Pay attention to the maximum load capacity of hooks, which is measured in pounds. Light duty hooks work for things like towels and hats. Medium duty options support heavier items like bikes or small toolboxes. Heavy duty hooks can hold very heavy loads like ladders. Choose hooks rated for more than you expect to store.
Hook Arm Length
Many hooks come in different arm lengths. In general, longer arms allow you to hang larger objects. But they also stick out further from the wall. Measure items you want to hang and leave enough clearance. Standard lengths are 3″, 4″, 5″, 6″ and up.
Hook Arm Style
Hook arms come in solid or swivel designs:
- Solid: Fixed in place. Provides maximum stability for heavy items.
- Swivel: Pivots left and right. Allows easy loading and unloading of gear. Better for frequently accessed tools.
Swivel hooks cost a bit more but provide added functionality.
Material
Hooks are constructed from various materials:
- Plastic: Lightweight but can be brittle with heavy loads. Best for light duty use.
- Metal: Very strong but may rust over time, especially with moisture exposure. Stainless steel offers rust resistance.
- Rubber Coated: Metal hook with rubber coating to prevent scratches and dampen noise. Provides protection.
For garage use, metal or rubber coated hooks are ideal for durability. Stainless steel is best for wet areas.
Number of Hooks
Decide how many hooks you need based on the items you want to store. It’s cheaper to buy hooks in multi-packs. Get extras since your needs may change. You can never have too many hooks!
Now that you know what to look for, it’s time to pick the right hooks to organize your unique garage items. Browse online or visit local hardware stores to see available options in person before purchasing.
Choosing Mounting Location
Once you’ve obtained hooks, the next key step is mapping out placement. Follow these tips for optimal hook location:
- Focus first on highly cluttered areas to maximize impact. Storage over a messy workbench is a prime opportunity.
- Distribute hooks evenly around the garage to avoid overloading one area. Space and stability are important.
- Map out items to be stored and visualize hook placement above them. Group similar items together for efficiency.
- Take measurements to confirm enough clearance for hooks and hanging items. Leave room to easily load/unload.
- Avoid hooks above vehicle parking areas to prevent bumping heads and hooks. Leave those areas clear.
- Consider possible movement paths so hooks don’t obstruct walking lanes when loaded.
- Review garage door range of motion to prevent interference. Leave several feet of clearance around the door.
- Have a plan for vertical ladder storage using hooks above the door or along a high wall. Leave space for this.
- Check for overhead pipes, wiring, ducts, or ceilings that limit hook height. Adjust plans to avoid those obstructions.
With measurements and potential obstructions in mind, use painter’s tape to mark the exact planned location for each hook on the walls. Tape lets you adjust as needed until the layout is dialed in.
Selecting Proper Mounting Hardware
Now for the foundation of the whole system – selecting the right hardware to mount the hooks securely. Several factors impact garage wall mounting:
Hook Material and Weight
Lighter plastic hooks can use basic screws. Heavier metal hooks require more robust anchoring. Consider hook weight when selecting hardware.
Wall Material
Garage walls are often made of concrete, drywall, or wood. Concrete and drywall typically need special anchors. Wood normally only requires screws. Match hardware to your walls.
Load Weight
Review total weight capacity for the hooks you selected. Choose anchors or fasteners rated for more weight than your hooks can handle. Over-engineer the mounting for safety.
Garage Vibration
Rumbling garage doors and opening mechanisms can loosen wall attachments over time. Opt for vibration-resistant anchors and screws for reliability.
Moisture Resistance
Garage humidity demands anchors and fasteners designed to prevent rust and corrosion. Stainless steel or coated options are ideal for wet areas.
With these factors in mind, here are common garage mounting hardware options:
- Concrete Anchors: Hammer into concrete to create threaded hole for lag bolt. Great holding power.
- Molly Bolts: Anchor in drywall with wings that fold out when tightened to brace on rear side. Sturdy grip.
- Toggle Bolts: Insert through drywall hole then flip wings out on backside to lock in place when tightened. Holds heavy loads.
- Wood Screws: Simplest option directly into wooden studs. Use 3-4″ screws for good stud penetration. Pre-drill holes.
Visit your local hardware store and consult with an employee about the best anchors for your hooks, walls, and loads. They can ensure you get the right garage mounting hardware.
Installing Garage Wall Hooks
You’ve chosen the right hooks, picked ideal wall locations, and selected suitable mounting hardware. Now it’s time for the fun part – securely installing your new garage storage hooks!
Follow these step-by-step instructions to properly hang wall hooks:
Gather Tools and Supplies
You’ll need:
- Hooks and mounting hardware
- Tape measure
- 4′ Level
- Stud finder (for wood walls)
- Pencil
- Electric drill and driver bit
- 1/8″ drill bit for pilot holes
- Socket wrench (for lag bolts)
- Hammer (for concrete anchors)
- Safety glasses and work gloves
Check you have everything before starting.
Mark and Prep Mounting Points
Use your tape measure and level to identify and mark precise hook locations based on your plan. Make sure lines are perfectly horizontal.
For wood walls, use the stud finder to mark stud centers for strong screw attachment.
Use the 1/8” drill bit to make pilot holes in the marked centers to pre-start anchor insertion or screw penetration. This makes mounting much easier.
Mount Anchors and Screws
If using concrete anchors, carefully hammer them into the pilot holes until flush with the wall. Turning while hammering eases insertion.
For drywall anchors, rotate them into the pilot holes until the wings fully open against the backside of the wall.
Drive wood screws directly into stud pilot holes using an electric drill. Slow speed prevents stripping.
Check that all anchors/screws are sunk completely flush with no gaps.
Attach Hooks
Tighten hooks onto anchors with wrenches or by hand until very snug against the wall. Avoid over-tightening.
For swivel hooks, you can position the arms as needed after installation.
Double check all hooks are completely secure and ready to hold weight. Try gently hanging on each one to confirm stability.
Mounting Best Practices
Keep these additional garage hook mounting tips in mind:
- When drilling into studs, carefully avoid hitting plumbing or wiring. Use a stud finder and inspect the area first.
- Wear safety glasses when hammer drilling or anchoring concrete to prevent eye injuries.
- For heavy pegboard panels, consider direct metal frame anchoring vs hanging from hooks alone for added strength.
- Leave 1-2 inches of clearance between the hook and wall. This allows easier loading and prevents wall scraping.
- Periodically check hooks for looseness over time. Tighten or replace as needed to maintain security.
- Consider height adjustments for family members. Place some hooks lower for kids to easily reach.
- Leave space to potentially add more hooks in the future. Your storage needs will likely grow.
That covers the complete process for safely and effectively installing sturdy wall mounted storage hooks in your garage. Take it slow, double check your work, and use the right hardware for your hooks and walls.
Before long, you’ll have a newly organized garage with tools, sporting goods, gardening equipment and anything else right at your fingertips!
FAQs
1. How much weight can garage wall hooks hold?
Garage wall hooks are available in light, medium and heavy duty designs with weight capacities ranging from 10-15 lbs up to 100+ lbs each. Choose hooks rated for double the weight of what you expect to store.
2. How do I know if my garage walls are concrete or drywall?
Knock on the wall and listen for a hollow sound which indicates drywall construction. A thicker solid wall that does not echo is typically concrete. You can also cut into a small inconspicuous area to inspect the cross-section.
3. What is the best spacing between garage wall hooks?
Space hooks between 16-24 inches apart depending on the hook size and items stored. Leave enough horizontal clearance for easy loading/unloading without hooks interfering with each other.
4. Should garage hooks be installed into wall studs or anchors?
For drywall, use specialized drywall anchors like Molly bolts designed to hold heavy weight. For wood stud walls, directly drilling into the studs provides very strong attachment.
5. How high should I mount garage hooks?
Install hooks 7-8 feet high for long items like ladders and hoses. Shorter hooks for frequently accessed tools should go at chest height for ease of use. Take height of users into account as well.
Conclusion
Installing wall mounted storage hooks provides incredible organization and utility in garages. Enhance the functionality of your garage with the perfect lighting system by strategically placing hooks, which not only frees up valuable floor space, reduces clutter, and makes finding gear a breeze, but also complements the overall organization. While setting up the ideal garage lighting system may require planning and careful measurement, nearly any DIYer can achieve it themselves with the right tools.
The key steps are:
- Select the ideal hooks for your specific storage needs
- Map out placement for functionality and clearance
- Choose hardware that securely anchors hooks on your wall type
- Carefully measure, drill pilot holes, and install anchors and screws
- Attach hooks snugly onto anchors and test weight stability
Follow the safety tips and best practices outlined above, and you’ll be rewarded with a clean and efficient garage. No more tripping over tools or wasted time hunting for equipment. Your hooks will provide service for many years to come. The only remaining problem will be running out of space to add new hooks!