










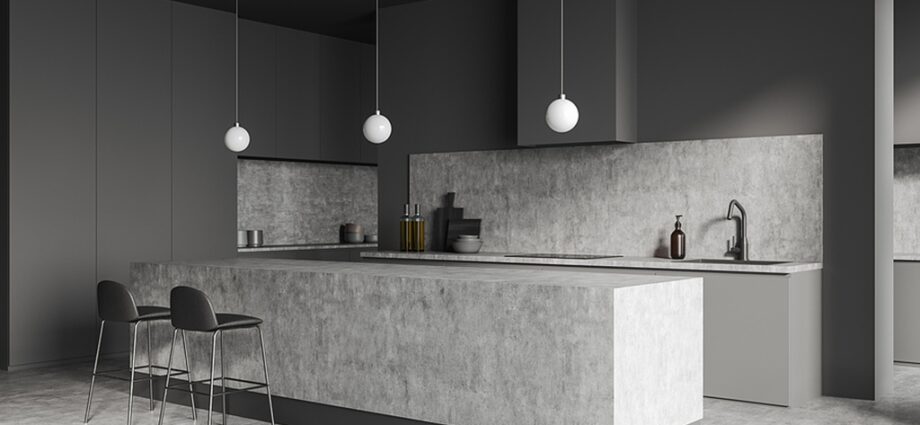
Concrete countertops have surged in popularity, bringing an industrial chic aesthetic into homes and businesses. Their raw, minimalist appeal offers a striking contrast to traditional materials like granite or laminate. However, the cost and labor associated with installing genuine concrete countertops can be prohibitive. Thankfully, there are several DIY-friendly methods to achieve the coveted concrete look without the hassle and expense. This comprehensive guide will walk you through various techniques, providing detailed instructions, and expert tips, and addressing common FAQs to help you create stunning concrete-inspired countertops.
Understanding the Allure of Concrete Countertops:
Before diving into the “how-to,” it’s essential to understand why concrete countertops are so desirable. Their appeal lies in their versatility, durability, and unique aesthetic. Concrete offers a seamless, monolithic appearance, adding a touch of modern sophistication to any space. The subtle variations in color and texture create a sense of depth and character, making each countertop unique. Moreover, concrete is known for its strength and longevity, making it a practical choice for high-traffic areas like kitchens and bathrooms.
However, traditional concrete countertops involve pouring and curing a heavy slab, requiring specialized skills and equipment. This process can be messy, time-consuming, and expensive. The good news is that alternative methods can replicate the look of concrete with readily available materials and basic DIY skills.
Method 1: Microcement – The Authentic Concrete Finish:
Microcement, also known as micro-topping or micro-concrete, is a thin, polymer-modified cement overlay that adheres to existing surfaces. It provides a seamless, smooth, and durable finish that closely resembles real concrete. This method is ideal for achieving a high-end, authentic concrete look.
Step-by-Step Guide:
- Surface Preparation: The key to a successful microcement application is meticulous surface preparation. Ensure your existing countertops are clean, smooth, and free from any loose particles. If the surface is glossy, lightly sand it to create a better bond. Fill any cracks or imperfections with a suitable filler.
- Primer Application: Apply a bonding primer to the countertop surface. This primer enhances adhesion and ensures the microcement bonds properly. Allow the primer to dry completely according to the manufacturer’s instructions.
- Base Coat Application: Mix the microcement according to the manufacturer’s instructions. Apply a thin, even layer of the base coat using a trowel. Work in small sections and create a slightly textured surface. Allow the base coat to dry for the recommended time.
- Second Coat Application: Apply a second thin layer of microcement, creating a smoother finish. You can use different trowel techniques to achieve the desired texture and variations. Allow the second coat to dry completely.
- Sanding and Finishing: Once the microcement is dry, lightly sand the surface with fine-grit sandpaper to remove any imperfections and create a smooth finish. Clean the surface thoroughly.
- Sealer Application: Apply a high-quality concrete sealer to protect the microcement from stains and moisture. Apply multiple coats, allowing each coat to dry completely. A matte or satin sealer is recommended for a natural concrete look.
Expert Tips for Microcement:
- Practice on a sample board before applying microcement to your countertops.
- Work in a well-ventilated area, as microcement can release fumes.
- Use a flexible trowel for smoother application and better control.
- Consider adding pigments to the micro cement mix to customize the color.
- Invest in a high-quality sealer designed for concrete surfaces.
Method 2: Concrete Overlay – A Textured Concrete Alternative:
Concrete overlay is a thicker application of modified concrete that creates a more textured and rustic concrete look. This method is suitable for those who prefer a more organic and tactile finish.
Step-by-Step Guide:
- Surface Preparation: Similar to microcement, thorough surface preparation is crucial. Clean, sand, and prime the existing countertops.
- Mixing the Overlay: Mix the concrete overlay according to the manufacturer’s instructions. The mixture will be thicker than micro cement.
- Applying the Overlay: Apply the concrete overlay using a trowel or sponge. Create a textured surface by pressing and manipulating the overlay. You can use tools like sponges, rollers, or texture mats to create unique patterns.
- Drying and Curing: Allow the concrete overlay to dry and cure according to the manufacturer’s instructions. This process may take longer than microcement.
- Sanding and Finishing: Once the overlay is cured, sand the surface to remove any sharp edges or imperfections.
- Sealer Application: Apply a high-quality concrete sealer to protect the overlay from stains and moisture.
Expert Tips for Concrete Overlay:
- Experiment with different tools and techniques to create unique textures.
- Consider using stencils or stamps to create patterns on the overlay.
- Allow ample time for the overlay to dry and cure completely.
- Use a thicker sealer for better protection against heavy use.
Method 3: Paint Techniques – Achieving the Concrete Look with Paint:
For a budget-friendly and less labor-intensive option, paint techniques can effectively replicate the look of concrete. This method is ideal for those who want a quick and easy transformation.
Step-by-Step Guide:
- Surface Preparation: Clean, sand, and prime the existing countertops.
- Base Coat Application: Apply a base coat of gray paint. Choose a shade that resembles the desired concrete color.
- Sponge Technique: Use a sea sponge or rag to apply layers of lighter and darker gray paint, creating a mottled effect. This technique simulates the natural variations in concrete.
- Dry Brushing: Use a dry brush to apply subtle highlights and shadows, adding depth and dimension to the painted surface.
- Sealer Application: Apply multiple coats of a durable polyurethane or epoxy sealer to protect the painted surface.
Expert Tips for Paint Techniques:
- Use high-quality paints designed for countertops or cabinets.
- Experiment with different shades of gray to achieve the desired concrete look.
- Practice the sponge and dry brushing techniques on a sample board.
- Apply multiple thin coats of sealer for better protection.
Related: How to Prevent Concrete Countertops from Cracking: A Comprehensive Guide
Method 4: Epoxy Resin – A Smooth and Glossy Concrete Alternative:

Epoxy resin offers a smooth, glossy, and durable finish that can replicate the look of polished concrete. This method is ideal for those who prefer a sleek and modern aesthetic.
Step-by-Step Guide:
- Surface Preparation: Clean, sand, and prime the existing countertops.
- Mixing the Epoxy: Mix the epoxy resin according to the manufacturer’s instructions. You can add pigments to customize the color.
- Pouring the Epoxy: Pour the epoxy resin onto the countertop surface, spreading it evenly with a trowel or squeegee.
- Removing Air Bubbles: Use a heat gun or torch to remove any air bubbles from the epoxy resin.
- Curing: Allow the epoxy resin to cure according to the manufacturer’s instructions.
- Sanding and Polishing (Optional): Once the epoxy is cured, you can sand and polish the surface for a smoother finish.
Expert Tips for Epoxy Resin:
- Work in a well-ventilated area, as epoxy resin can release fumes.
- Use a self-leveling epoxy resin for a smoother finish.
- Pour the epoxy resin in a controlled manner to avoid spills.
- Allow ample time for the epoxy resin to cure completely.
People Also Ask (FAQs):
Q: Are DIY concrete countertop alternatives durable?
A: Yes, when properly applied and sealed, DIY concrete countertop alternatives can be very durable. Microcement and concrete overlays offer excellent durability, while paint techniques and epoxy resin provide good durability with proper sealing.
Q: Can I use these methods on any countertop surface?
A: Yes, these methods can be applied to most countertop surfaces, including laminate, tile, and wood. However, proper surface preparation is crucial for a successful application.
Q: How much does it cost to DIY concrete countertops?
A: The cost varies depending on the method and materials used. Paint techniques are the most budget-friendly, while microcement and epoxy resin may be more expensive. However, DIY methods are generally significantly cheaper than installing genuine concrete countertops.
Q: How long does it take to DIY concrete countertops?
A: The time required varies depending on the method and the size of the countertops. Paint techniques can be completed in a day or two, while micro cement and concrete overlays may take several days due to drying and curing times.
Q: How do I clean and maintain concrete-look countertops?
A: Clean the countertops with a mild soap and water solution. Avoid using harsh chemicals or abrasive cleaners. Reseal the countertops periodically to maintain their durability and appearance.
Q: Can I customize the color and texture of my concrete-look countertops?
A: Yes, you can customize the color and texture by adding pigments to the microcement, concrete overlay, or epoxy resin. You can also use different tools and techniques to create unique textures.
Q: Are these methods food-safe?
A: Yes, when properly sealed with a food-safe sealer, these methods can be used on kitchen countertops. Always check the manufacturer’s instructions for the sealer.