









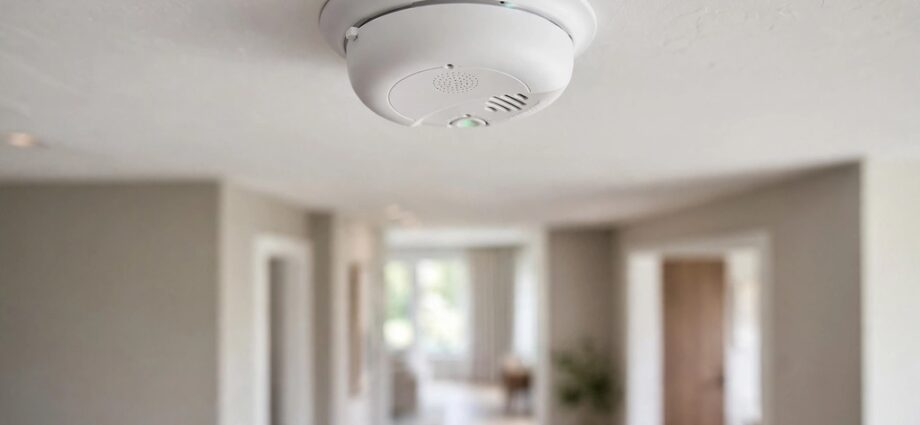
A first alert smoke alarm warns you early about smoke and fire in your home. You install it correctly, test it regularly, and respond quickly when it sounds. Therefore, this guide explains setup, testing, troubleshooting, and replacement in clear steps. Explore this dual-sensor protection guide when a first alert smoke alarm must also cover gas.
First, you learn where to place alarms for strong coverage in every room. Next, you discover how sounds and lights signal danger, low power, or faults. Also, you find safe fixes for beeping, chirping, false alarms, and silence controls.
Finally, you understand when to clean, reset, replace, or seek professional help. Meanwhile, safety comes first whenever smoke, fire, or carbon monoxide remains possible. Evacuate immediately if you cannot rule out danger, and call emergency services outside.
How a First Alert Smoke Alarm Protects Your Home
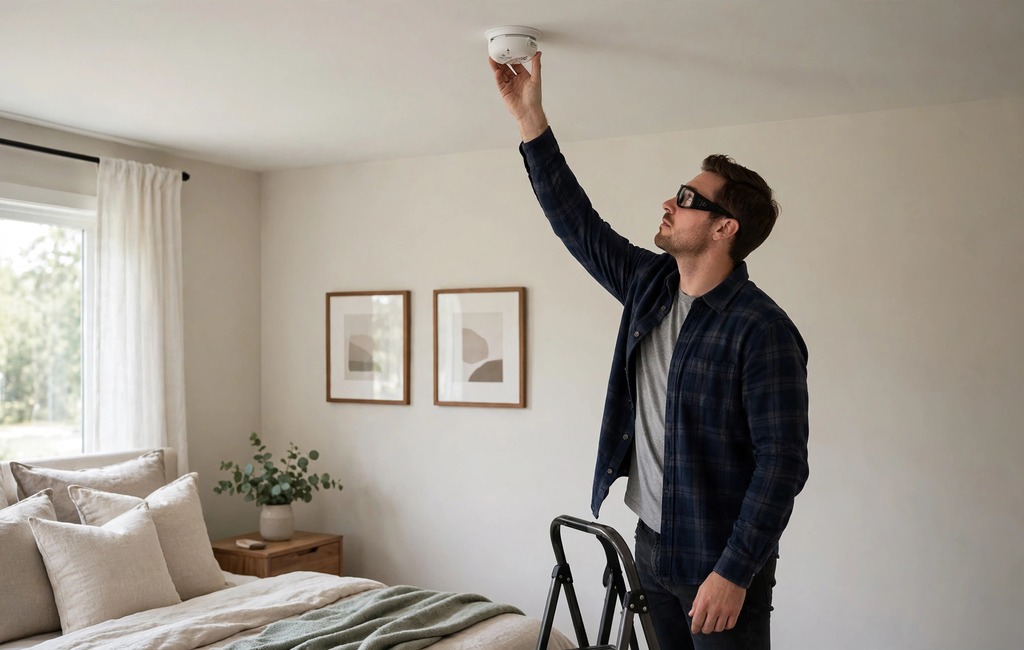
A first alert smoke alarm senses smoke particles in the air around it. It sounds a loud alarm when smoke reaches its sensor chamber. Consequently, household members gain precious time to escape safely.
You place alarms where smoke travels first during a fire. Smoke rises quickly toward ceilings and upper floors in most homes. Therefore, ceiling placement gives sensors an early chance to detect danger.
Interconnected alarms add another layer of protection for larger homes. One alarm triggers every connected alarm when it detects smoke. As a result, people in distant rooms hear the warning sooner.
Alarms protect sleeping households especially well at night. Smoke and fire can spread silently while everyone sleeps deeply. However, a loud alarm wakes sleepers and prompts immediate action.
You still need an escape plan alongside working alarms. Alarms warn you, but they cannot remove smoke or fire. Additionally, practice your escape routes twice each year with every household member.
Keep hallways and exits clear for fast evacuation at any hour. Clutter near doors slows escape during smoke and panic. Meanwhile, teach children to leave immediately and meet outside.
Never ignore a full alarm because you see no smoke yet. Smoke may hide in another room, wall space, or floor. Therefore, treat every full alarm as real until you confirm safety.
Check alarms monthly so they stay ready for real emergencies. A silent alarm offers no protection during a fire. Also, replace weak batteries promptly before they fail completely.
First Alert Smoke Alarm: Alarm Types and Sensor Choices
First alert smoke alarm models differ by power source and sensor design. Some models run only on replaceable batteries for simple installation. Other models connect to household power with battery backup.
Battery models suit renters and homes without wired alarm circuits. You mount them quickly without electrical work or wiring changes. However, you must replace batteries on schedule for reliable protection.
Hardwired models draw steady power from your home electrical system. Their backup batteries keep them working during power outages. Consequently, hardwired models suit permanent installations in many homes.
Sealed battery models contain a built-in battery for long service. You never replace that battery during the alarm service life. Instead, you replace the whole alarm when it reaches end of life.
Ionization and Photoelectric Sensors Explained
Ionization sensors respond quickly to fast flaming fires with small particles. They detect invisible particles from rapidly burning materials. Therefore, ionization sensors suit rooms with fast fire risks.
Photoelectric sensors respond well to slow smoldering fires with larger particles. They detect visible smoke from smoldering bedding, upholstery, or wiring. As a result, photoelectric sensors suit bedrooms and living areas.
Dual sensor alarms combine both sensing methods in one unit. They cover fast flaming fires and slow smoldering fires together. Additionally, dual sensors reduce gaps in detection across fire types.
Your model manual explains which sensor type your alarm uses. Procedures vary by model, so always check that manual first. Meanwhile, never assume one sensor type covers every fire scenario.
Interconnected and Smart Alarm Options
Interconnected alarms communicate with each other through wires or wireless signals. One detecting alarm activates every alarm in the network. Consequently, warnings reach bedrooms, basements, and upper floors together.
Wireless interconnection simplifies installation in finished homes without new wiring. You link compatible alarms following your model manual steps. However, procedures vary by model, so follow those steps exactly.
Smart alarms may send alerts to a phone or voice assistant. They help you learn about alarms when you stay away. Additionally, smart features never replace local alarms and escape plans.
Voice alarms announce the danger type in clear spoken words. They distinguish smoke danger from carbon monoxide danger for listeners. Therefore, household members can choose the correct response faster.
Where to Place Alarms in Your Home: First Alert Smoke Alarm
Place a first alert smoke alarm inside every bedroom for direct protection. Sleeping occupants need alarms close enough to wake them. Therefore, bedroom alarms form the foundation of home coverage.
Place alarms outside each sleeping area in hallways as well. Hallway alarms catch smoke before it reaches closed bedroom doors. Additionally, hallway placement protects guests and children in nearby rooms.
Install alarms on every level, including basements and finished attics. Fires can start on any level without warning signs. Consequently, level coverage prevents blind spots in multi-story homes.
Mount alarms on ceilings whenever your manual allows ceiling mounting. Smoke rises and collects near ceilings during most fires. Meanwhile, wall mounting works only where manuals permit that position.
Keep alarms away from kitchens, bathrooms, and steamy areas when possible. Steam and cooking smoke leave units that keep sounding, so check first alert smoke alarm placement. However, keep alarms close enough to protect adjacent living spaces.
Avoid dusty garages, furnace rooms, and drafty windows for smoke alarms. Dust and drafts interfere with sensors and cause false signals. Instead, choose clean, stable locations with steady airflow.
Place alarms away from ceiling fans and supply vents. Strong airflow pushes smoke away from sensor chambers. As a result, alarms near vents may detect smoke too slowly.
Check local codes and your model manual for placement rules. Placement guidance varies by home layout and alarm type. Therefore, follow the stricter rule when codes and manuals differ.
Placement Mistakes to Avoid
Never place an alarm directly above a stove or shower. Heat and steam flood sensors and trigger nuisance alarms repeatedly. Consequently, households may ignore later warnings after repeated false alarms.
Never hide alarms behind curtains, furniture, or decorations. Obstructions block smoke flow into the sensor chamber. Additionally, hidden alarms stay harder to test and maintain regularly.
Never install only one alarm for a large home. One alarm cannot protect distant bedrooms and floors effectively. Instead, build coverage room by room until every level has protection.
Never paint over an alarm or cover its vents. Paint blocks sensor openings and muffles alarm sounds. Meanwhile, dust covers also reduce sensitivity during real fires.
First Alert Smoke Alarm: Installing a Battery Alarm Step by Step
First, read your model manual completely before you start installation. Manuals list battery type, mounting steps, and placement limits. Therefore, you avoid mistakes that weaken protection later.
Next, choose a ceiling location that meets placement guidance. Mark screw positions through the mounting bracket with a pencil. Also, confirm the surface holds screws firmly without crumbling.
Attach the mounting bracket securely with the supplied screws. A loose bracket lets the alarm sag or fall. Consequently, test bracket stability before you attach the alarm body.
Insert the correct battery type with correct polarity markings. Wrong battery choices often cause beeping after a battery swap in a first alert smoke alarm. Match positive and negative ends to compartment markings exactly. Additionally, close the battery drawer fully until it clicks shut.
Twist or slide the alarm onto its bracket until it locks. A partially mounted alarm may lose battery contact unexpectedly. Meanwhile, listen for a click that confirms secure mounting.
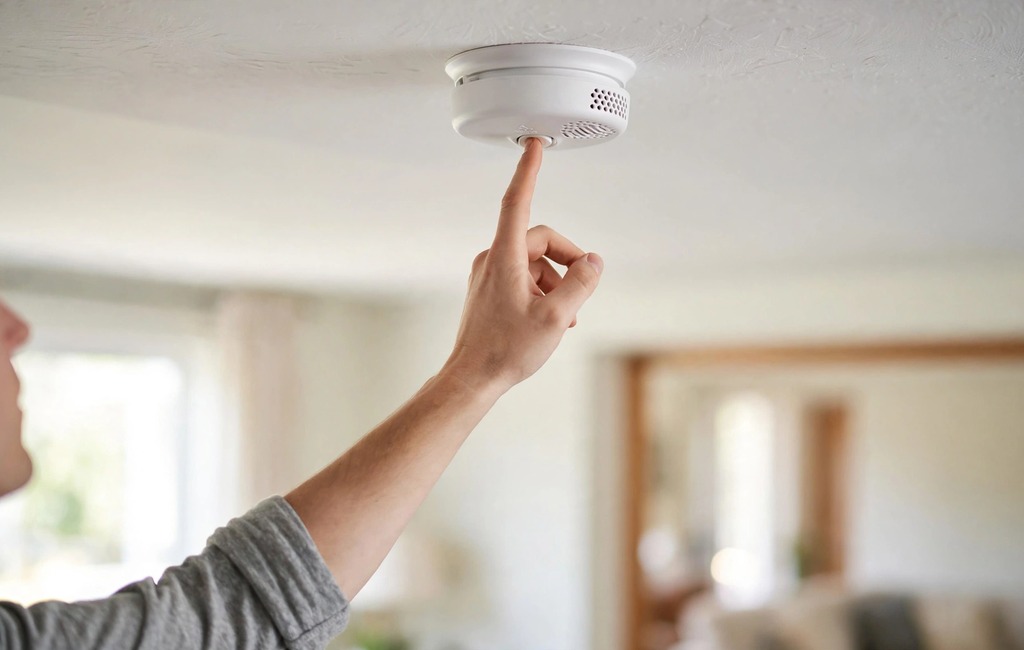
Press the test button after mounting to confirm loud alarm sounds. Hold the button until the alarm pattern sounds clearly. Therefore, you verify sensor, horn, and battery work together.
Record the installation date on a label or household log. A written date helps you track service life accurately. Also, note battery change dates for future maintenance checks.
Show every household member the alarm location and test sound. Familiar sounds reduce panic during real emergencies at night. Finally, explain evacuation routes during the same conversation.
Installing a Hardwired Alarm Safely: First Alert Smoke Alarm
Turn off power at the breaker before you touch any wiring. Live wires create shock risks during installation work. Therefore, verify power stays off with a reliable tester.
Remove the old alarm carefully after you confirm power stays off. Disconnect the wiring harness without pulling wires forcefully. Additionally, label wires if your manual recommends that step.
Connect the new wiring harness following your model manual exactly. Procedures vary by model, so never guess wire connections. Meanwhile, secure wire connectors firmly to prevent loose contacts.
Mount the new alarm onto its bracket after wiring connections. Restore power at the breaker only after secure mounting. Consequently, the alarm can run its startup checks safely.
Insert or confirm the backup battery after you restore power. Backup batteries protect your home during power outages. Also, test the alarm after installation to confirm proper operation.
Call a qualified electrician when wiring looks damaged or confusing. Electrical work demands skill, tools, and code knowledge. Therefore, professional help protects your home better than guesswork.
Test interconnected alarms together after hardwired installation. Trigger one alarm test and listen for other alarms. As a result, you confirm the network communicates correctly across rooms.
Never install a hardwired alarm while power remains on. Short circuits and shocks can injure installers quickly. Instead, pause work and switch power off first.
First Alert Smoke Alarm: Testing Your Alarm Every Month
Press and hold the test button until the alarm sounds loudly. A loud pattern confirms horn, power, and sensor circuits work. Therefore, monthly testing catches failures before real emergencies.
Warn household members and pets before you test alarms. Sudden loud sounds startle children, pets, and sleeping adults. Additionally, brief warnings prevent panic during routine tests.
Test alarms during daytime when household members stay alert. Daytime tests let you hear alarms from other rooms. Meanwhile, note any alarm that sounds weak or inconsistent.
Replace batteries immediately when a test reveals weak sounds. Weak sounds signal low power or failing components inside. Consequently, prompt replacement restores full alarm strength.
Test interconnected alarms from different rooms each month. One test should trigger connected alarms throughout the network. Also, check alarms that stay silent during network tests.
Keep a simple test log with dates and results. A log reveals patterns like repeated failures in one location. Finally, review the log during seasonal home maintenance checks.
Never test alarms with real smoke or open flames. Real smoke damages sensors and creates fire risks indoors. Instead, use only the built-in test button for checks.
Replace any alarm that fails testing after battery replacement and reset. Persistent failure signals internal faults beyond simple maintenance. Therefore, replacement protects your household better than repeated retries.
Understanding Sounds and Light Signals: First Alert Smoke Alarm
A first alert smoke alarm uses distinct sounds for distinct conditions. Three beeps signal smoke detection in many models. Four beeps signal carbon monoxide detection in combination models.
Single chirps signal low battery or maintenance needs in many models. Chirps repeat at intervals until you fix the cause. Consequently, pattern counting helps you identify the correct response.
Five chirps sometimes signal end of life in some models. That pattern means sensor service life has ended. However, patterns vary by model, so always check your manual.
Continuous loud alarms demand immediate evacuation and emergency calls. Never treat continuous alarms as routine maintenance signals. Instead, leave immediately and call emergency services from outside.
Silence buttons pause nuisance alarms for a short period. They never disable protection permanently during that pause. Additionally, alarms resume normal monitoring after the silence period ends.
Light Signals and What They Mean
A slow red blink often signals normal standby operation. Many models blink slowly while they monitor air continuously. Therefore, slow blinking usually means your alarm works correctly.
A rapid red blink may signal a recent alarm or fault. Check for smoke, recent events, or sensor problems promptly. Meanwhile, compare the pattern with your model manual guidance.
A steady green light often signals household power in hardwired models. Green lights confirm electrical power reaches the alarm. However, light meanings vary by model, so verify yours.
No light may signal dead batteries, loose mounting, or power loss. Check battery seating, bracket contact, and breaker status. Consequently, quick checks restore monitoring before danger strikes.
Flashing lights combined with chirps point toward specific faults. Note both light timing and sound pattern together. Also, record patterns before you reset or replace anything. For a full breakdown, review blinking red light meanings on your first alert smoke alarm.
First Alert Smoke Alarm: Beeping Sounds and Their Causes
First alert smoke alarm beeping often starts with a low battery warning. That warning repeats as a short chirp at regular intervals. Therefore, you should replace the battery promptly after first hearing it.
Beeping patterns often confuse homeowners during nighttime chirps. Before replacing parts blindly, explore beeping causes and fixes on a first alert smoke alarm. Meanwhile, you keep safety first while you investigate any sound.
Low batteries lose voltage faster during cold nights in some homes. Temperature drops can trigger chirps at night especially. Consequently, nighttime chirps often point toward weak batteries first.
Dust inside the sensor chamber also triggers beeping without smoke. Particles disturb sensing and create false signals. Additionally, insects or cobwebs inside vents cause similar problems.
Loose battery drawers create intermittent contact and repeated chirps. A drawer that clicks shut fully prevents contact gaps. Meanwhile, corroded contacts interrupt power and trigger warnings.
Hardwired alarms beep after power surges or brief outages. Surges confuse internal circuits and store fault signals. Therefore, a reset often clears beeping after power returns.
Interconnected alarms beep together when one unit reports trouble. Finding the originating unit saves time during troubleshooting. As a result, check indicator lights across all alarms first.
Never silence beeping by removing batteries or unplugging alarms. Removing power eliminates protection during real fires. Instead, fix the cause while keeping alarms powered.
How to Narrow Down a Beep Pattern
Count beeps and chirps carefully before you act. Three beeps mean smoke danger in many models. Four beeps mean carbon monoxide danger in combination models.
One chirp at intervals usually means low battery power. Five chirps at intervals may mean sensor service life ended. However, always confirm patterns in your model manual.
Note whether lights blink with each sound pattern. Combined signals narrow causes faster than sounds alone. Additionally, timing between chirps reveals battery versus fault warnings.
Write down the pattern, time, and room location. Written notes help electricians or support staff diagnose faults. Finally, repeat observations after each fix you try.
Chirping Sounds That Repeat: First Alert Smoke Alarm
Smoke alarm chirping differs from a full alarm pattern. Chirps sound short, quiet, and intermittent rather than continuous. Therefore, chirps usually signal maintenance needs, not immediate danger.
Chirping patterns vary by cause and timing. Compare chirp timing on a first alert smoke alarm with chirping sounds explained here. Meanwhile, you should still evacuate if danger remains possible.
Replaceable battery models chirp when battery voltage drops low. Fresh batteries restore voltage and stop most chirps quickly. Consequently, battery replacement solves the most common chirping cause.
Sealed battery models chirp near service life end instead. You cannot replace sealed batteries during normal use. Instead, replace the whole alarm when sealed models chirp persistently.
Humidity from showers or cooking can trigger temporary chirping. Steam clears slowly from sensor chambers in humid rooms. As a result, chirps may stop after air dries completely.
Temperature swings near windows or exterior walls trigger chirps. Cold air lowers battery voltage temporarily at night. Additionally, warm air expands contacts and changes resistance slightly.
Clean chirping alarms gently before you assume sensor failure. Vacuum soft brush attachments remove dust without opening chambers. Meanwhile, avoid sprays or liquids near sensor openings.
Reset chirping alarms only after you fix likely causes. Resetting clears stored fault signals from internal memory. Therefore, reset works best alongside battery replacement or cleaning.
First Alert Smoke Alarm: Blinking Red Light Explained
Smoke alarm blinking red often worries homeowners unnecessarily at first. Slow blinking usually signals normal standby monitoring in many models. Therefore, slow blinking alone rarely demands urgent action.
Light patterns confuse homeowners when alarms blink unexpectedly. Check light meanings in your manual before replacing healthy alarms. Meanwhile, you should still investigate rapid or steady lights promptly.
Many battery models blink red about once each minute. That slow blink confirms power and sensor monitoring continue. Consequently, homeowners can treat slow blinking as reassurance.
Rapid blinking may signal a recent alarm event or fault. The alarm stores recent events and flashes rapidly afterward. Additionally, rapid blinking may accompany chirps or fault signals.
Steady red lights may signal active detection or internal faults. Check rooms for smoke before you touch the alarm. Meanwhile, evacuate immediately if smoke or fire remains possible.
Blinking after battery changes often signals startup self checks. New batteries trigger brief light patterns during initialization. As a result, blinking may settle into slow standby within minutes.
Loose mounting interrupts power and changes light patterns. A fully locked bracket restores steady battery contact. Therefore, remount alarms firmly when lights behave erratically.
Replace alarms when rapid blinking persists after cleaning and reset. Persistent faults signal sensor degradation or internal damage. Finally, record light patterns for support or electrician visits.
When an Alarm Keeps Going Off Without Smoke: First Alert Smoke Alarm
Smoke alarm keeps going off without visible smoke frustrates many households. Nuisance alarms usually trace to cooking, steam, dust, or placement. Therefore, systematic checks identify causes faster than repeated silencing.
Nuisance alarms disrupt sleep and daily routines quickly. Review room placement, cooking sources, and steam paths during checks. Meanwhile, never disable alarms because nuisance alarms annoy you.
Cooking particles travel far from kitchens into hallway alarms. Frying, broiling, and toasting release particles that sensors detect. Consequently, alarms near kitchens sound during normal cooking.
Steam from showers drifts into hallway alarms near bathrooms. Those particles resemble smoke particles to some sensors. Additionally, closing bathroom doors reduces steam drift substantially.
Dust from construction, vacuuming, or nearby workshops triggers alarms. Airborne dust enters sensor chambers and disturbs detection. Meanwhile, cleaning during dusty work prevents many nuisance alarms.
Insects inside sensor chambers trigger alarms unexpectedly at night. Small insects crawl into vents and block sensing paths. As a result, gentle cleaning removes insects without damaging sensors.
Interconnected systems amplify one nuisance alarm across every room. One kitchen alarm triggers alarms in bedrooms and basements. Therefore, finding the originating unit matters during nuisance events.
Relocate nuisance alarms only following manual placement guidance. Moving alarms too far weakens protection in key areas. Instead, improve ventilation and cleaning before you move alarms.
First Alert Smoke Alarm: Silencing and Turning Off an Alarm Safely
Turn off smoke alarm sounds only after you rule out danger. Silence buttons pause nuisance alarms for a short time. Therefore, silence never replaces investigation or evacuation decisions.
Silence controls help households manage nuisance alarms safely. Follow silencing a unit safely on a first alert smoke alarm after ruling out danger. Meanwhile, evacuate first when smoke or fire remains possible.
Press the silence button only for clearly harmless causes. Cooking smoke, steam, or dust qualify as harmless causes. However, unknown causes demand evacuation instead of silencing.
Silence pauses the horn while sensors continue monitoring air. Alarms resume sounding if smoke levels rise again. Consequently, silence gives you time to ventilate without losing protection.
Ventilate the area after you silence a nuisance alarm. Open windows and run fans after you turn off smoke alarm noise safely. Additionally, remove the source when cooking or steam causes alarms.
Never unplug alarms or remove batteries to stop noise. Unplugging removes protection exactly when fires may start. Instead, silence temporarily and fix the underlying cause promptly.
Hardwired alarms need breaker caution during any silencing work. Never touch wiring while power remains on. Meanwhile, use only the silence button for temporary quiet.
Check the originating unit in interconnected systems before silencing. Silencing another unit may quiet only that unit. Therefore, locate rapid flashing indicators on originating units first.
Resetting an Alarm After a False Alert: First Alert Smoke Alarm
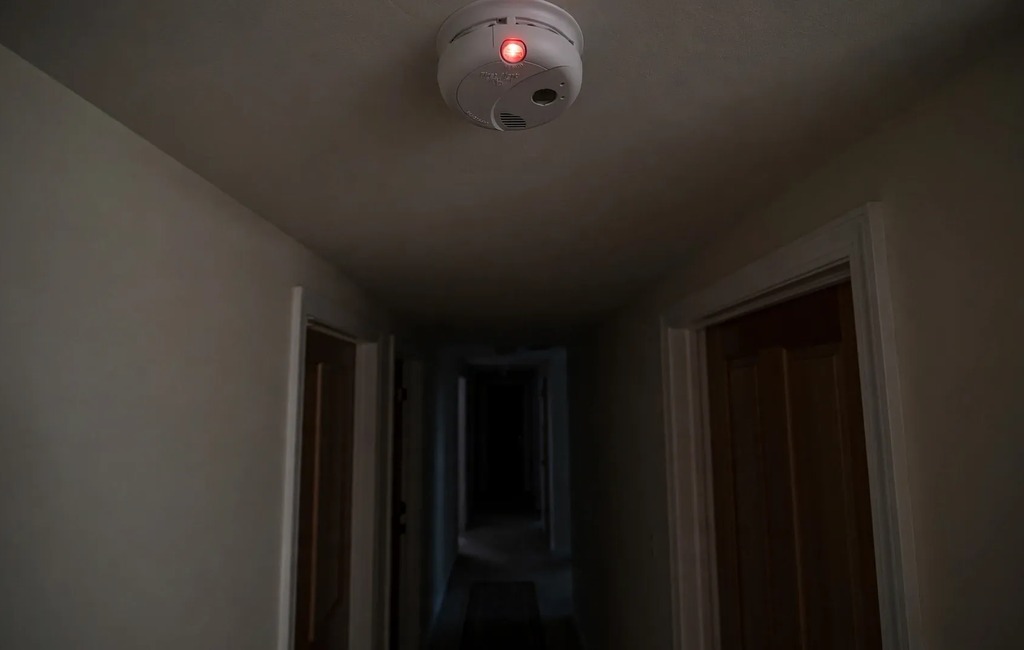
Reset smoke alarm memory after false alerts or power interruptions. Stored fault signals can cause chirps after causes disappear. Therefore, resetting clears old signals and restores normal monitoring.
Stored fault signals linger after false alerts end. Follow reset steps after alerts on a first alert smoke alarm carefully. Meanwhile, procedures vary by model, so check your manual first.
Battery models reset through battery removal and button holds. Remove the battery, hold the test button, and reinstall. Additionally, holding the button drains residual charge from circuits.
Hardwired models reset through breaker power and button holds. Turn off breaker power, disconnect power, and hold buttons. Consequently, combined steps clear stored signals more reliably.
Reset alarms only after you fix batteries, dust, or placement. You can reset smoke alarm memory after fixing batteries or dust. Meanwhile, test alarms after reset to confirm normal operation.
Observe alarms for several minutes after any reset. Persistent chirps after reset signal deeper faults or service end. As a result, further troubleshooting or replacement becomes necessary.
Record reset dates and outcomes in your maintenance log. Logs reveal whether resets solve problems or merely delay them. Finally, repeated resets in one location demand deeper investigation.
Call support or an electrician when resets fail repeatedly. Persistent faults may involve wiring or sensor damage. Therefore, professional diagnosis protects households better than endless resets.
First Alert Smoke Alarm: Battery Changes and Persistent Beeping
Beeping after battery change confuses homeowners after careful replacement. New batteries should stop low battery chirps immediately. However, stored signals, loose drawers, or faults can continue chirps.
Fresh batteries sometimes fail to stop chirps immediately. Troubleshoot persistent chirps by checking type, polarity, and drawer closure. Meanwhile, check battery type against your manual first.
Confirm battery type matches manual recommendations exactly. Wrong battery types deliver incorrect voltage for sensors. Consequently, alarms chirp despite fresh but unsuitable batteries.
Check battery polarity markings before you close drawers. Reversed batteries prevent proper power flow to sensors. Additionally, reseat batteries firmly when contacts look loose.
Close battery drawers fully until they click shut. Partially closed drawers interrupt power intermittently during use. Meanwhile, test alarms after drawer closure to confirm contact.
Clean battery contacts gently when corrosion or dust appears. Corrosion blocks power flow and mimics low battery conditions. As a result, clean contacts restore reliable power delivery.
Reset alarms after battery changes when chirps persist. Residual charge stores low battery signals in circuits. Therefore, button holds drain residual charge before reinstallation.
Replace alarms when new batteries and resets fail together. Combined failure signals sensor age or internal faults. Finally, never use old batteries from drawers as replacements.
Battery Maintenance Schedule
Replace replaceable batteries at least once each year. Annual changes prevent most low battery chirps. Additionally, change batteries immediately after any low warning.
Test batteries monthly using the built-in test button. Monthly tests reveal weak power before chirps start. Meanwhile, log test results for seasonal review.
Store spare batteries in cool, dry locations away from metal. Heat and moisture degrade battery power over time. Consequently, fresh spares perform better during emergencies.
Recycle old batteries through local collection programs safely. Old batteries leak chemicals when stored in drawers. Instead, drop them at approved recycling points promptly.
Combination Smoke and Carbon Monoxide Protection: First Alert Smoke Alarm
Smoke and carbon monoxide alarm units protect against two distinct dangers. One side detects particles from fires in your home. Carbon monoxide alarms detect invisible, odorless gas from fuel burning appliances.
Dual protection units combine smoke and gas sensing. Compare options across models before choosing dual protection for bedrooms. Meanwhile, combination alarms never replace separate coverage where manuals require it.
Combination alarms use different beep patterns for each danger. Three beeps signal smoke danger in many models. Four beeps signal carbon monoxide danger in combination models.
Voice combination alarms announce danger type in spoken words. Spoken warnings help household members respond correctly at night. Consequently, voice alerts reduce confusion during emergencies.
Place combination alarms inside bedrooms and outside sleeping areas. Add units on every level for complete coverage. Additionally, keep them away from fuel appliances following manual guidance.
Test combination alarms monthly using the test button. Monthly tests confirm both smoke and carbon monoxide circuits. Meanwhile, note any pattern that differs from manual descriptions.
Replace combination alarms when either sensor reaches service end. One expired sensor compromises dual protection for households. Therefore, replace whole units rather than hoping one sensor suffices.
Never use smoke alarms as carbon monoxide protection alone. Smoke sensors cannot detect carbon monoxide gas at all. Instead, add carbon monoxide coverage where fuel appliances operate.
Smoke Alarm Versus Carbon Monoxide Alarm
Smoke alarm vs carbon monoxide alarm comparisons clarify distinct sensor jobs. One sensor type detects airborne particles from combustion fires. Carbon monoxide sensors detect gas levels from incomplete fuel burning.
Sensor jobs differ sharply between smoke and gas detection. Use comparing two detector types on a first alert smoke alarm for each hazard. Meanwhile, neither sensor type substitutes for the other.
Smoke rises quickly, so ceiling placement suits smoke sensors best. Carbon monoxide mixes with air at many heights. Consequently, combination alarms mount on ceilings for smoke detection priority.
Fuel burning appliances create carbon monoxide risks without visible smoke. Furnaces, stoves, fireplaces, and heaters can leak gas silently. Additionally, attached garages introduce carbon monoxide through doors and vents.
Symptoms of carbon monoxide exposure include headache, dizziness, and confusion. Those symptoms resemble common illnesses and confuse victims. Therefore, alarms provide crucial warnings before symptoms worsen.
Evacuate immediately for carbon monoxide alarms and call emergency services outside. Fresh air outside reduces exposure while responders investigate sources. Meanwhile, never re-enter until responders confirm safety.
Ventilate only after evacuation when responders advise that step. Opening windows may help after people leave safely. However, never delay evacuation to ventilate rooms first.
Install carbon monoxide alarms near sleeping areas for nighttime warnings. Sleeping occupants need loud warnings before gas levels rise. Finally, test carbon monoxide alarms monthly alongside smoke alarms.
Carbon Monoxide Safety and Evacuation
Carbon monoxide gas stays invisible and odorless in homes. You cannot see, smell, or taste dangerous gas levels. Therefore, alarms provide the only reliable early warning.
Fuel burning appliances need regular professional maintenance and ventilation checks. Blocked vents trap gas indoors during heating seasons. Additionally, annual servicing catches cracks and blockages early.
Never run vehicles inside attached garages with doors closed. Vehicle exhaust fills garages with carbon monoxide quickly. Meanwhile, open garage doors fully before starting vehicles.
Never use ovens, grills, or generators for indoor heating. Those appliances release carbon monoxide during normal operation. Consequently, indoor use creates deadly gas buildup quickly.
Place generators outdoors far from windows, doors, and vents. Generator exhaust drifts indoors through openings unexpectedly. As a result, outdoor distance protects occupants better.
Teach household members carbon monoxide alarm patterns and responses. Four beeps signal carbon monoxide danger in combination models. Additionally, practice evacuation routes for gas alarms separately.
Evacuate immediately when carbon monoxide alarms sound loudly. Move everyone, including pets, to fresh air outside. Meanwhile, call emergency services from outside and report alarm patterns.
Seek medical attention promptly for headache, nausea, or dizziness. Those symptoms may signal carbon monoxide exposure after alarms. Therefore, responders and clinicians should evaluate exposed occupants.
Cleaning and Routine Maintenance
Clean first alert smoke alarm units gently every few months. Dust buildup reduces sensor sensitivity over time. Consequently, regular cleaning prevents many nuisance alarms.
Use a soft brush vacuum attachment around vents and openings. Gentle suction removes dust without opening sensor chambers. Additionally, wipe exteriors with a dry cloth only.
Avoid water, sprays, and cleaning chemicals near alarm sensors. Liquids damage sensor chambers and electronic circuits. Meanwhile, keep paint and polish away from vents.
Inspect alarms for cracks, discoloration, or loose brackets. Damage signals replacement needs before failures occur. As a result, visual checks complement monthly button tests.
Keep alarms free from cobwebs in basements and attics. Cobwebs block smoke flow into sensor chambers. Therefore, check less visited rooms during seasonal cleaning.
Replace batteries during cleaning visits when warnings appear. Combined maintenance saves time and prevents missed steps. Finally, log cleaning dates alongside battery and test dates.
Seasonal Maintenance Checklist
- Spring check: Test every alarm and replace weak batteries promptly.
- Summer check: Clean vents gently and inspect brackets for looseness.
- Autumn check: Review escape routes and practice evacuation drills together.
- Winter check: Test alarms after heating systems start operating regularly.
Seasonal checks spread maintenance across the whole year. Small tasks prevent large failures during emergencies. Additionally, seasonal routines keep alarms visible in household planning.
Involve household members in seasonal maintenance tasks. Shared responsibility ensures someone checks alarms during absences. Meanwhile, teach teenagers basic test and cleaning steps safely.
Service End Signals and Replacement
End of life warning signals mean sensor service life has ended. Sensors degrade gradually even when test buttons still sound. Therefore, replacement becomes necessary despite apparent operation.
Service life limits surprise homeowners after years of use. Learn replacement timing from manufacture dates on alarm labels. Meanwhile, check manufacture dates on alarm labels first.
Many alarms last about ten years from manufacture dates. Labels on alarm backs show manufacture dates clearly. Consequently, date checks prevent reliance on expired sensors.
Five chirps sometimes signal end of life in some models. That pattern repeats until you replace the unit. However, patterns vary by model, so confirm yours in manuals.
New batteries cannot extend sensor service life beyond limits. Batteries restore power but cannot renew aging sensors. Additionally, resets cannot reverse sensor degradation over time.
Replace expired alarms promptly with compatible new models. Compatibility matters for interconnected systems and mounting brackets. Meanwhile, follow manual steps for new alarm installation.
Dispose of old alarms following local waste guidance. Some communities accept alarms through special collection programs. As a result, proper disposal protects environments and households.
Record replacement dates for every new alarm installed. Written records simplify future end of life checks. Finally, set reminders before each alarm reaches service end.
Common Mistakes That Weaken Protection

Skipping monthly tests ranks among the most common mistakes. Untested alarms may fail silently for months. Therefore, monthly tests catch failures before emergencies strike.
Removing batteries to stop chirps removes protection completely. Households forget to reinstall batteries after silencing chirps. Additionally, missing batteries leave homes unprotected at night.
Covering alarms with tape or cloth muffles sounds dangerously. Covers block smoke entry and reduce horn volume. Meanwhile, painted alarms lose sensitivity through blocked vents.
Installing too few alarms leaves distant rooms unprotected. Large homes need alarms on every level and bedroom. Consequently, coverage gaps delay warnings during fires.
Ignoring repeated nuisance alarms teaches households to dismiss warnings. Repeated false alarms breed complacency over time. Instead, investigate causes and fix placement or cleaning issues.
Forgetting manufacture dates keeps expired alarms in service. Expired sensors may fail during real fires. As a result, date checks belong in every maintenance routine.
Mixing incompatible interconnected alarms breaks network communication. Incompatible models may fail to trigger together. Therefore, confirm compatibility before adding new units.
Storing manuals away from homes complicates troubleshooting later. Manuals explain patterns, resets, and battery types precisely. Finally, keep manuals accessible in a household binder.
Troubleshooting Checklist for Everyday Problems
Start troubleshooting by noting sound, light, and room patterns. Patterns guide fixes faster than random part replacements. Additionally, written notes prevent repeated guesswork during stressful nights.
Check batteries first for chirps and weak test sounds. Fresh correct batteries solve many common problems quickly. Meanwhile, confirm drawer closure and contact cleanliness.
Clean alarms second when dust or insects seem likely. Gentle vacuum cleaning removes particles without sensor damage. Consequently, cleaning solves many nuisance alarms in dusty rooms.
Reset alarms third after battery and cleaning fixes. Resets clear stored fault signals from circuits. As a result, alarms return to normal monitoring after resets.
Check placement fourth when nuisance alarms repeat in one room. Steam, cooking, and drafts trigger alarms near problem spots. Therefore, placement changes may reduce nuisance alarms substantially.
- Battery fix: Insert fresh correct batteries and close drawers fully.
- Cleaning fix: Vacuum vents gently with a soft brush attachment.
- Reset fix: Hold the test button after battery and cleaning steps.
- Placement fix: Move alarms away from steam and cooking sources.
- Replacement fix: Replace alarms after persistent faults or service end.
Use the checklist in order during every troubleshooting session. Ordered steps prevent skipping simple fixes for complex ones. Finally, stop troubleshooting and evacuate when danger remains possible.
When to Call for Professional Help
Call a qualified electrician for damaged wiring or breaker problems. Electrical faults create shock and fire risks during repairs. Therefore, professional work protects homes better than DIY guesses.
Call support when alarms fail after batteries, cleaning, and reset. Persistent failures signal internal faults beyond household maintenance. Additionally, support staff can confirm compatibility and replacement options.
Call emergency services immediately for smoke, fire, or gas danger. Emergency responders investigate dangers with protective equipment. Meanwhile, stay outside until responders confirm safety.
Seek professional placement advice for complex or large homes. Professionals assess layouts, levels, and sleeping areas thoroughly. Consequently, expert placement closes coverage gaps effectively.
Request help when interconnected systems fail to trigger together. Network failures involve wiring, compatibility, or configuration issues. As a result, professionals diagnose networks faster than trial replacements.
Document problems before professional visits with patterns and dates. Clear records speed diagnosis and reduce repeat visits. Finally, keep manuals ready for technicians during appointments.
Frequently Asked Questions
Why does my first alert smoke alarm beep at night?
Cold temperatures lower battery voltage at night and trigger low battery chirps.
What does a slow blinking red light mean?
A slow red blink usually signals normal standby monitoring in many models.
Can I silence a nuisance alarm safely at home?
You can silence clearly harmless alarms only after you rule out danger completely.
How often should I test my smoke alarm?
Test every alarm monthly using its built-in test button.
When should I replace my smoke alarm completely?
Replace alarms promptly when they reach service end or fail tests.
Keep Your Home Protected Starting Today
A first alert smoke alarm protects your household only with correct setup and care. Install alarms in bedrooms, hallways, and every level today. Additionally, test alarms monthly and replace batteries promptly.
Learn sounds and lights so you respond correctly under stress. Patterns distinguish smoke danger, gas danger, low batteries, and faults. Consequently, pattern knowledge turns panic into clear action.
Fix chirps, blinking faults, and nuisance alarms without disabling protection. Cleaning, batteries, resets, and placement solve most problems safely. Meanwhile, replace expired alarms before sensors fail completely.
Review your escape plan with every household member this week. Practice routes, choose an outside meeting place, and confirm everyone knows exits. Finally, check every alarm today, test each one, and replace any unit that fails. Also, act on end of life warnings on your first alert smoke alarm promptly.