











Learning how to install a dimmer switch safely is one of the simplest electrical upgrades homeowners can perform. A dimmer switch replaces a standard light switch and allows you to control brightness levels, reduce energy consumption, and extend bulb life. With basic tools and careful attention to safety, most homeowners can complete the installation in less than 30 minutes.
Lighting experts note that dimmers can reduce electricity use by up to 10–20% depending on usage patterns. According to studies from energy efficiency programs in the United States and Europe, dimming LED lighting also increases bulb lifespan because reduced power lowers heat output.
Despite these benefits, many people avoid installing dimmers because they assume electrical work requires professional help. In reality, installing a dimmer switch is considered a beginner-friendly home improvement task when proper safety steps are followed.
This guide explains the process step by step. You will learn the tools required, safety precautions, wiring instructions, troubleshooting tips, and common mistakes to avoid. By the end, you will understand exactly how to replace a light switch with a dimmer safely and when it is best to call a professional electrician.
Why Should You Install a Dimmer Switch in Your Home?
Short Answer: Installing a dimmer switch improves lighting control, saves energy, and extends bulb lifespan.
Many homeowners upgrade to dimmer switches because they provide flexibility that standard switches cannot. Instead of simply turning lights on or off, dimmers allow you to adjust brightness depending on the situation.
Key Benefits of Installing a Dimmer Switch
- Energy savings by lowering power consumption
- Longer lifespan for LED and incandescent bulbs
- Better control over room ambiance
- Reduced glare and eye strain
- Lower heat output from lighting
A case study conducted by a residential energy efficiency program found that households using dimmable LED lighting reduced lighting electricity consumption by roughly 15%. Over a year, this translated to measurable cost savings.
Dimmers also make spaces more comfortable. Lower lighting levels are often preferred for dining rooms, bedrooms, and living rooms, while brighter settings work better for reading or cooking.
What Tools and Materials Do You Need to Install a Dimmer Switch?
Short Answer: You need a compatible dimmer switch, screwdriver, voltage tester, wire connectors, and electrical tape.
Before beginning the installation, gather the necessary tools. Preparation helps avoid interruptions during the process.
Basic Tools Required
- Flathead screwdriver
- Phillips screwdriver
- Voltage tester or multimeter
- Wire stripper
- Electrical tape
- Needle-nose pliers
Materials Needed
- Compatible dimmer switch
- Wire connectors (wire nuts)
- Faceplate for the switch
Choosing the right dimmer is important. Not all dimmers work with every bulb type.
| Bulb Type | Compatible Dimmer | Notes |
|---|---|---|
| LED | LED-compatible dimmer | Prevents flickering |
| Incandescent | Standard dimmer | Most compatible |
| Halogen | Standard dimmer | Works similar to incandescent |
| CFL | Special dimmable CFL dimmer | Only with dimmable bulbs |
Always confirm compatibility before installing the dimmer switch.
How Do You Install a Dimmer Switch Safely? (Step-by-Step Guide)
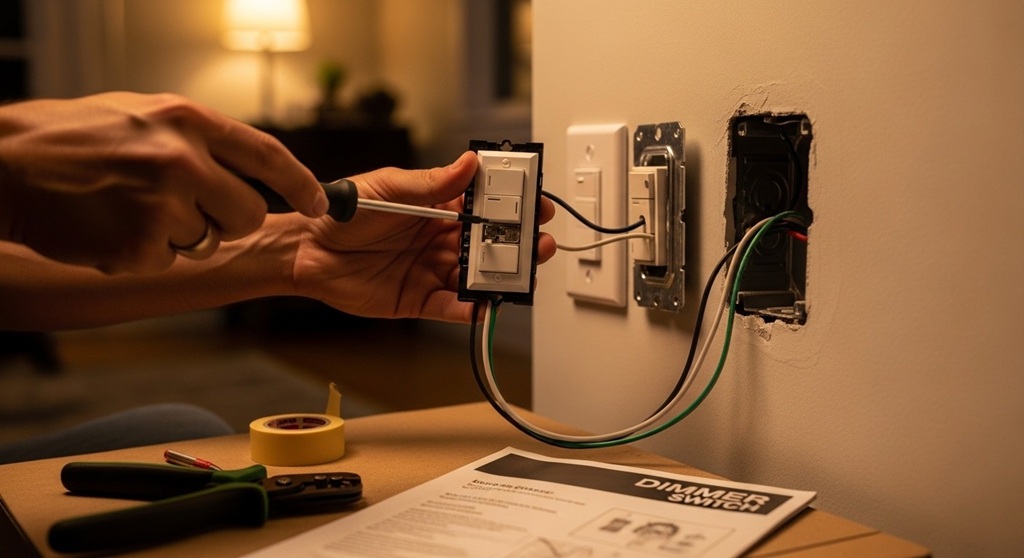
Short Answer: Turn off power, remove the old switch, connect the dimmer wires correctly, and secure the switch in the wall box.
Follow these steps carefully to ensure a safe installation.
Step 1: Turn Off the Power
Go to your electrical panel and switch off the circuit breaker controlling the light switch. Never work on live electrical wiring.
After turning off the breaker, confirm the power is off using a voltage tester.
Step 2: Remove the Existing Switch
Unscrew the wall plate and remove the mounting screws holding the switch in place. Carefully pull the switch out of the wall box to expose the wiring.
Step 3: Identify the Wires
Most switches have three wires:
- Hot wire (line) – carries power from the breaker
- Load wire – sends power to the light
- Ground wire – safety wire connected to the electrical box
Take a photo of the wiring before disconnecting anything. This helps if you need to reference the original setup.
Step 4: Disconnect the Old Switch
Loosen the screws holding the wires and detach them from the switch.
Step 5: Connect the Dimmer Switch
Follow the wiring diagram provided with your dimmer switch.
- Connect the hot wire to the dimmer input wire
- Connect the load wire to the dimmer output wire
- Attach the ground wire to the dimmer ground terminal
Use wire connectors to secure the connections.
Step 6: Install the Dimmer in the Wall Box
Carefully fold the wires back into the electrical box. Secure the dimmer with mounting screws.
Step 7: Attach the Wall Plate
Install the faceplate over the switch and tighten the screws.
Step 8: Restore Power
Turn the circuit breaker back on and test the dimmer switch.
If the light responds smoothly when adjusting brightness, the installation is complete.
What Safety Precautions Should You Follow When Installing a Dimmer Switch?
Short Answer: Always disconnect power, verify wiring, and use compatible dimmer switches.
Electrical safety should always come first. Even simple projects can become dangerous if proper precautions are ignored.
Important Safety Tips
- Turn off power at the breaker, not just the switch
- Use a voltage tester to confirm power is off
- Match dimmer wattage rating with lighting load
- Use UL-listed electrical components
- Never install dimmers on non-dimmable bulbs
Most residential dimmers support loads between 150 watts and 600 watts. Always check the manufacturer’s specifications.
What Are Common Mistakes When Installing Dimmer Switches?
Short Answer: Common mistakes include incorrect wiring, using incompatible bulbs, and exceeding wattage limits.
Typical Errors to Avoid
- Not turning off the breaker
- Mixing up line and load wires
- Using non-dimmable LED bulbs
- Installing a dimmer on a three-way switch incorrectly
- Overloading the dimmer beyond wattage limits
Incorrect wiring is the most common cause of dimmer failure. If lights flicker, buzz, or fail to turn on, recheck wiring connections.
How Do You Troubleshoot a Dimmer Switch That Isn’t Working?
Short Answer: Check wiring connections, bulb compatibility, and dimmer load capacity.
Common Problems and Solutions
| Problem | Possible Cause | Solution |
|---|---|---|
| Lights flicker | Incompatible LED bulbs | Use dimmable LED bulbs |
| Lights do not turn on | Loose wiring | Reconnect wires securely |
| Dimmer feels warm | High electrical load | Reduce wattage load |
| Buzzing sound | Low-quality dimmer | Upgrade to compatible dimmer |
If problems persist, consult a licensed electrician.
When Should You Call an Electrician Instead?
Short Answer: Call a professional if wiring is unclear, the switch is part of a complex circuit, or your home uses older electrical systems.
Some situations require expert help:
- Aluminum wiring
- Three-way or four-way switch systems
- Overloaded circuits
- Unlabeled wiring
- Damaged electrical boxes
Professional electricians ensure compliance with local electrical codes and safety regulations.
Conclusion: Can You Install a Dimmer Switch Without Professional Help?
Yes. Most homeowners can learn how to install a dimmer switch safely with basic tools and careful attention to safety procedures. The process involves turning off power, replacing the existing switch, connecting the dimmer wires correctly, and testing the new switch.
This small upgrade can significantly improve lighting control in your home. It also helps reduce electricity consumption and extends the life of your bulbs.
If you follow the steps outlined in this guide, installing a dimmer switch can be completed in less than half an hour.
Ready to upgrade your home lighting? Start by choosing a compatible dimmer switch and installing it in one room today. Once you see the difference in comfort and energy savings, you may want to upgrade the rest of your home as well.
Frequently Asked Questions (FAQ)
Can I replace a normal switch with a dimmer?
Yes. Most standard single-pole light switches can be replaced with a dimmer switch as long as the wiring configuration is compatible.
Do dimmer switches save electricity?
Yes. Dimming lights reduces electrical power consumption. Studies show lighting energy use can drop by about 10–20% depending on brightness levels.
Can LED lights work with dimmer switches?
Yes, but the LED bulbs must be labeled as dimmable, and the dimmer switch must be compatible with LED lighting.
How long does it take to install a dimmer switch?
For most homeowners, installation takes 20–30 minutes including safety checks.
Why do dimmer switches buzz?
Buzzing may occur due to incompatible bulbs, overloaded circuits, or lower-quality dimmer components.
Is installing a dimmer switch safe for beginners?
Yes. When the power is properly turned off and wiring instructions are followed carefully, installing a dimmer switch is considered a beginner-friendly home improvement project.
Can I install multiple dimmer switches in one home?
Yes. Many homeowners install dimmers in living rooms, bedrooms, and dining areas to improve lighting control.
Read More Also: How to Buy the Perfect Queen Bedroom Set
Find out: How to Choose the Best Ride-On Toys for Toddlers (Safety & Fun Guide)