








You have an above ground pool, and you’re loving those refreshing swims on hot summer days. But there’s one thing you’re not so fond of – the dirt and debris that have made your pool their home. No worries, my friend, we’ve got your back! In this guide, we’re going to dive deep into the art of vacuuming the dirt out of your above ground pool.
Picture this: Your pool, sparkling like a gem under the sun, inviting you for a dip. Sounds dreamy, right? Well, it’s not just a dream – with a bit of effort and the right knowledge, you can make it a reality.
Why Vacuuming Matters
Before we get into the nitty-gritty of how to vacuum your above ground pool, let’s chat about why it’s so important. Think of your pool as a giant bathtub. You wouldn’t want to soak in a dirty tub, would you? Similarly, nobody wants to swim in a pool filled with leaves, bugs, and algae. Vacuuming is your ticket to a clean, inviting pool.
Just like tidying up your living room or mowing your lawn, regular pool maintenance keeps things looking nice and prevents bigger problems down the line. Cleaning your pool not only enhances its appearance but also ensures that the water is safe and healthy for you and your family to enjoy. Plus, it can save you a lot of money in the long run by preventing damage to your pool equipment.
Now that you’re convinced of the importance of vacuuming, let’s get into the action!

What You’ll Need
Before you start, you’ll need a few tools and supplies to get the job done right. Here’s a quick rundown:
Pool Vacuum: This is your trusty sidekick for sucking up all that pesky debris. You can choose between manual and automatic vacuums. Manual vacuums require a bit more effort but are budget-friendly, while automatic ones do the work for you but come at a higher cost.
Telescopic Pole: Think of this as your vacuum’s extendable arm. It allows you to reach every corner of your pool without having to do any Olympic-style swimming.
Vacuum Hose: This flexible hose connects your vacuum head to the skimmer or dedicated vacuum line. Make sure it’s long enough to reach every part of your pool.
Vacuum Head: This attaches to the vacuum pole and is the part that actually touches the pool floor. There are different types for different pool surfaces (concrete, vinyl, or fiberglass), so choose the one that matches your pool.
Skimmer Basket: You’ll use this to collect large debris from the surface of the water before you start vacuuming. It prevents your filter from getting clogged too quickly.
Pool Chemicals: To keep your water clean and balanced, you’ll need chemicals like chlorine and pH adjusters. These aren’t directly related to vacuuming but are essential for overall pool maintenance.
Leaf Skimmer or Net: For removing larger debris like leaves and twigs from the water’s surface.
A Willing Helper: While not a tool or supply, having a friend or family member to assist you can make the process faster and more enjoyable. Plus, it’s always nice to have company!
Now that you’ve gathered your arsenal of pool-cleaning weaponry, it’s time to roll up your sleeves and get to work.
The Vacuuming Process
Okay, here’s where the rubber meets the road, or in this case, where the vacuum meets the pool floor. Follow these steps, and you’ll be well on your way to a spotless swimming paradise.
Step 1: Check Your Water Level
Before you start vacuuming, take a look at the water level in your pool. It should be at its normal operating level, usually halfway up the skimmer opening. If it’s too low, you might not be able to create the necessary suction to vacuum effectively. If it’s too high, your vacuum hose might not reach the bottom.
Step 2: Skim the Surface
Grab your leaf skimmer or net and scoop up any leaves, bugs, or other debris floating on the water’s surface. This step prevents your pool’s filter from getting clogged too quickly and makes the whole process more efficient.
Step 3: Assemble Your Vacuum
Attach the vacuum head to the telescopic pole and connect the vacuum hose to the vacuum head. If your pool has a dedicated vacuum line, you can connect the hose to it directly. If not, you’ll connect it to the skimmer.
Step 4: Prime the Vacuum Hose
If you’re connecting the vacuum hose to the skimmer, you’ll need to prime it. This means filling the hose with water to remove any air. Hold the vacuum head over the pool and slowly feed the hose into the water. You’ll see bubbles coming out of the hose as air is pushed out. Once water flows consistently from the hose, it’s primed and ready to go.
Step 5: Start Vacuuming
Lower the vacuum head into the pool, allowing it to sink to the bottom. Hold the telescopic pole firmly and guide the vacuum head across the pool floor, just like you’re vacuuming a carpet. Use slow, deliberate strokes to cover every inch of the pool bottom. Be patient – this isn’t a race!
Step 6: Empty the Skimmer Basket
As you vacuum, keep an eye on the skimmer basket. It will start to fill up with debris from the surface. When it’s about half full, stop vacuuming and empty the basket into a trash bag or compost pile. Then, continue vacuuming.

Step 7: Brush and Vacuum
If your pool has a built-in brush, use it to gently scrub the pool walls and corners while you vacuum. This helps loosen any algae or dirt that may be clinging to the surfaces.
Step 8: Keep an Eye on the Filter Pressure
While you’re vacuuming, periodically check the pressure gauge on your pool’s filter system. If it’s significantly higher than the normal range, it’s a sign that the filter is getting clogged. You may need to backwash or clean the filter before continuing.
Step 9: Finish and Disconnect
Once you’ve covered the entire pool bottom and the water looks clear, it’s time to finish up. Turn off the pump and disconnect the vacuum hose from the skimmer or dedicated line. Remove the vacuum head from the pole.
Step 10: Backwash the Filter (if needed)
If your filter pressure is high, it’s time to backwash. Follow your pool’s specific instructions for this process, but generally, it involves reversing the flow of water through the filter to flush out trapped debris.
Step 11: Check and Adjust Chemical Levels
After all that hard work, it’s essential to check and adjust your pool’s chemical levels to keep the water balanced and safe. Test the water for chlorine, pH, alkalinity, and calcium hardness, and make any necessary adjustments following the manufacturer’s recommendations.
Step 12: Enjoy Your Clean Pool!
Now that you’ve put in the effort, it’s time to reap the rewards. Dive in and enjoy your freshly cleaned pool. Invite your friends and family over for a swim, or simply bask in the satisfaction of a job well done.
FAQs (Frequently Asked Questions)
How often should I vacuum my above ground pool?
It’s a good idea to vacuum your above ground pool at least once a week, especially during the swimming season. However, the frequency may vary depending on factors like your pool’s location, the surrounding environment, and the number of swimmers. If you notice excessive debris or the water becoming cloudy, don’t hesitate to vacuum more frequently.
Can I use an automatic pool cleaner for my above ground pool?
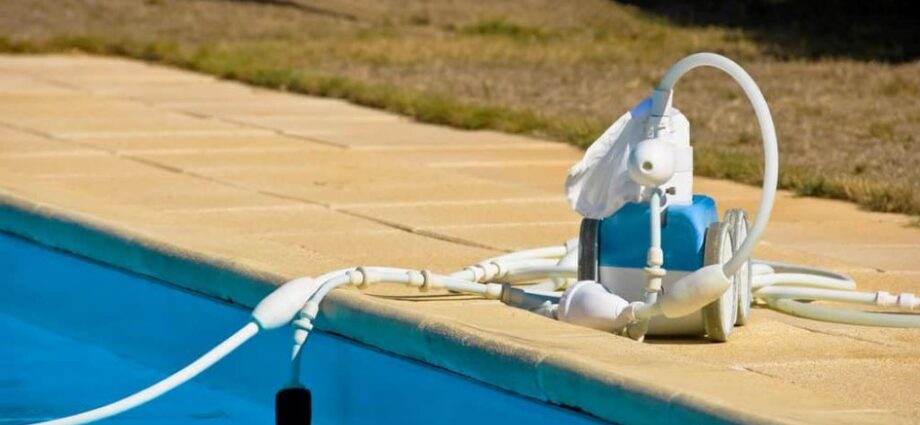
Absolutely! Automatic pool cleaners are a great choice for above ground pools. They come in various types, such as robotic cleaners, suction-side cleaners, and pressure-side cleaners. The one you choose will depend on your budget and personal preference. These devices can make pool maintenance even more convenient.
How do I know if my pool’s filter needs cleaning or backwashing?
Keep an eye on the pressure gauge on your pool’s filter system. If the pressure reading is significantly higher than the normal range, it’s a sign that the filter is becoming clogged and needs attention. You should backwash or clean the filter according to your pool’s specific instructions to maintain optimal filtration.
Do I need to use pool chemicals when vacuuming my pool?
While pool chemicals are not directly related to vacuuming, it’s crucial to maintain proper chemical balance in your pool water. Vacuuming removes physical debris, but chemicals like chlorine and pH adjusters are necessary to keep the water safe, clean, and balanced. Always test and adjust your pool’s chemical levels as needed, especially after vacuuming.
What should I do if my pool water remains cloudy after vacuuming?
Cloudy pool water can have various causes, such as imbalanced chemicals, poor filtration, or high levels of organic matter. After vacuuming, make sure your pool’s chemical levels are within the recommended ranges. Check the filter and ensure it’s clean and functioning correctly. If the problem persists, consider using a pool clarifier or consulting a professional pool technician for a more in-depth assessment.
Finally
Now that you’re armed with the knowledge of how to vacuum dirt out of your above ground pool, go ahead and make your pool the envy of the neighborhood. Remember, it’s not just about cleanliness; it’s about creating a haven of relaxation and fun for you and your loved ones. So, before you consider pouring Drano into a tub with standing water, ensure you’re following safety guidelines to maintain that peaceful oasis. Happy swimming!